


How to free up storage space on your Nintendo Switch for more digital games?

Why Your Switch Needs a Storage Boost
Your Nintendo Switch is a fantastic portable console, but its internal storage can fill up surprisingly fast, especially if you’re a fan of digital downloads. With many AAA titles easily exceeding 10GB, you’ll quickly find yourself hitting the limit of the 32GB (or 64GB for OLED models) internal memory. The good news is that freeing up space is straightforward, and with a few simple strategies, you can make room for many more adventures.
Running out of space often means you have to choose which games to keep and which to delete, but there are smarter ways to manage your storage. Let’s explore how to optimize your Switch’s memory.

Understanding Your Switch’s Storage
Checking Your Current Space
Before you start deleting, it’s wise to see what’s taking up the most space. Go to System Settings > Data Management. Here, you’ll find a breakdown of your internal storage, microSD card storage (if applicable), and how much space each game or application occupies.
- Internal Memory: The console’s built-in storage.
- microSD Card: Expandable storage that holds downloaded software, updates, and screenshots/videos.
- Save Data: Crucially, save data is almost always stored on the internal memory and cannot be moved to a microSD card. It’s also typically very small in file size.
Smart Ways to Free Up Space
1. Archive Software (The Best Method)
Archiving is your best friend when it comes to freeing up significant space without losing your save data. When you archive a game, the game’s main data is deleted from your console, but its icon remains on your HOME Menu, and more importantly, your save data stays intact. You can re-download the game at any time from the eShop or your user page if you own it digitally.
To archive:
- From the HOME Menu, select the game you want to archive.
- Press the + button (or – button) to open Options.
- Go to Data Management > Archive Software.
- Confirm your choice.
This is ideal for games you might play again but aren’t actively playing right now.
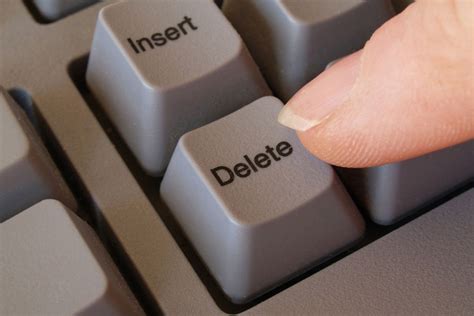
2. Delete Software (Use with Caution)
Deleting software completely removes the game and its save data from your console. While this frees up the most space, only do this if you are absolutely certain you won’t play the game again and don’t care about your progress, or if you have a Nintendo Switch Online membership with cloud save backup enabled for that specific game.
To delete:
- From the HOME Menu, select the game.
- Press the + button (or – button).
- Go to Data Management > Delete Software.
- Confirm your choice.
Always prioritize archiving over deleting unless you understand the implications for your save data.
3. Get a microSD Card (Essential for Digital Hoarders)
If you primarily download digital games, a high-capacity microSD card is virtually essential. The Switch supports microSD, microSDHC, and microSDXC cards up to 2TB (though 1TB is currently the largest available and most practical). Once inserted, all new game downloads and updates will automatically install to the microSD card until it’s full.
To move existing software to a microSD card, you cannot directly transfer individual games. You’ll need to archive or delete the game from internal storage and then re-download it while the microSD card is inserted. The system will then install it onto the card.
Look for cards from reputable brands (SanDisk, Samsung, etc.) with U1 or U3 speed ratings for optimal performance.

4. Manage Screenshots and Video Captures
Over time, your collection of epic screenshots and 30-second video clips can add up. While individual files are small, thousands of them can consume significant space, especially on internal memory if you haven’t transferred them to a microSD card.
To manage them:
- Go to HOME Menu > Album.
- Select the screenshot or video you want to delete.
- Press A, then choose Delete. You can also delete multiple items by pressing Y in the album and selecting them.
- To transfer to an SD card or PC, go to System Settings > Data Management > Manage Screenshots and Videos. You can copy them to an SD card or even wirelessly transfer them to a smart device or computer.
5. Clear Corrupt Data and Downloaded Updates/DLC
Sometimes, downloaded data can become corrupt or certain update files for games you no longer own might linger. You can check for and delete these by going to System Settings > Data Management > Manage Software, then selecting a specific game. Here you might find options to delete update data or DLC separately if applicable. Corrupt data can also sometimes be found and deleted from within the Data Management menu directly.
Keeping Your Switch Lean for Endless Gaming
By regularly reviewing your installed software and making smart choices about archiving, deleting, and especially investing in a quality microSD card, you can ensure your Nintendo Switch always has room for new adventures. Remember to check your data management settings periodically and make these strategies a part of your routine console maintenance.
Don’t let storage limitations hold you back from exploring the vast library of digital games available on the Nintendo eShop. Happy gaming!


