


How to expand Switch console storage for more digital games, big & small?

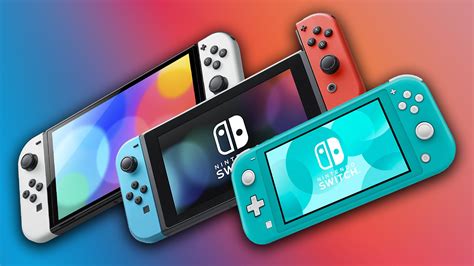
The Nintendo Switch, a marvel of portable gaming, boasts an impressive library of digital titles, from sprawling AAA adventures to charming indie gems. However, its built-in storage of 32GB (or 64GB for the OLED model) quickly fills up, leaving many gamers frustrated when they can’t download their next big purchase or even a game update. Fortunately, expanding your Switch’s storage is a straightforward process, ensuring you’ll never have to delete beloved games just to make room for new ones.

Why Your Switch Needs More Space
Even if you prefer physical game cartridges, many titles require significant downloads for updates, patches, and DLC. Digital-only games, which make up a vast portion of the Switch’s eShop, vary wildly in size but can easily consume several gigabytes each. Consider a few popular titles: The Legend of Zelda: Tears of the Kingdom is around 18.2GB, and Pokémon Scarlet/Violet is about 10GB. Add a handful of these, plus system updates and screenshots, and your internal storage vanishes in no time.
Running out of space means difficult choices: archiving games, deleting save data (which is usually safe on the internal memory, but tied to the game itself), or constantly redownloading. This can be a major inconvenience, especially for players with slow internet connections or those who travel frequently.
The Ultimate Solution: MicroSD Cards
Nintendo designed the Switch with expandability in mind, and the answer to its storage woes lies in a tiny, yet powerful, accessory: the microSD card. The Switch supports microSD, microSDHC, and microSDXC cards, offering an immense range of capacities to suit every gamer’s needs. Unlike external hard drives, which are incompatible, microSD cards seamlessly integrate with the console, acting as primary storage for all your digital game downloads.
Choosing the Right MicroSD Card for Your Switch
Selecting the perfect microSD card involves a balance of capacity, speed, and reliability:
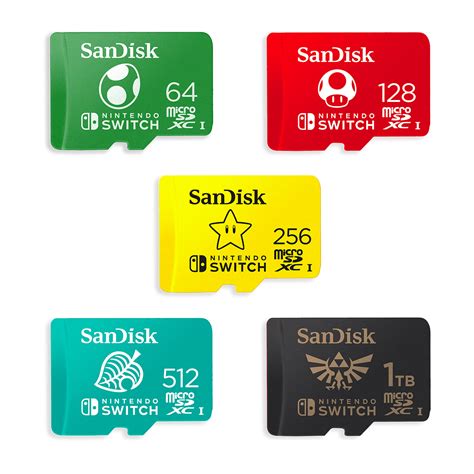
- Capacity: While the Switch theoretically supports cards up to 2TB, these are rare and very expensive. Most users find 128GB, 256GB, or 512GB to be excellent sweet spots. A 128GB card will significantly boost your storage, while a 256GB or 512GB card offers vast room for even the most extensive digital libraries. Consider a 1TB card if you’re an avid digital collector and budget allows.
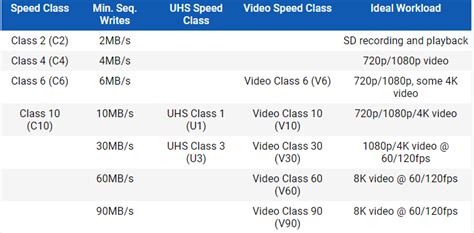
- Speed: This is crucial for smooth gameplay and fast load times. Look for cards with a UHS-I (Ultra High Speed Phase I) rating, specifically those with a U1 or, even better, a U3 speed class. U3 cards offer faster minimum sequential write speeds, which translates to quicker game installations and shorter loading screens. Avoid generic, unbranded, or exceptionally cheap cards, as their advertised speeds are often inaccurate.
- Brand Reliability: Stick to reputable brands like SanDisk, Samsung, Lexar, and PNY. These brands are known for their quality, performance, and warranty support.
Installing Your New MicroSD Card
The installation process is incredibly simple:
- Power Off Your Switch: It’s recommended to completely power down your console, not just put it to sleep. Hold the power button, then select “Power Options” > “Turn Off.”
- Locate the Slot: The microSD card slot is hidden beneath the kickstand on the back of the Switch console. Flip the kickstand up.
- Insert the Card: Gently push the microSD card into the slot with the label facing the same direction as the console’s screen until it clicks into place.
- Power On: Close the kickstand and power on your Switch. The console will automatically detect and format the new card. You can verify it’s recognized by going to System Settings > Data Management.
Managing Your Game Data
Once installed, your Switch will automatically prioritize the microSD card for new game downloads. For games already on your internal storage that you wish to move, there isn’t a direct “move” function. Instead, you’ll need to archive the game from internal storage (this deletes the game data but keeps your save data) and then redownload it, at which point it will install onto your microSD card.
To do this: Highlight the game on the Home screen, press ‘+’, select “Manage Software” > “Archive Software.” Then, select the game icon again from the Home screen and choose to redownload. Your save data remains safely on the console’s internal memory or in the cloud if you have a Nintendo Switch Online subscription.
Tips for Optimal Storage Management
- Regularly Check Space: Periodically visit System Settings > Data Management to see how much space is left on your internal storage and microSD card.
- Consider Physical Cartridges: For very large games you know you’ll play often, physical cartridges can save precious digital storage space, as the core game data is on the cart.
- Utilize Nintendo Switch Online: A subscription provides cloud save backups, ensuring your progress is safe even if a card fails or is lost.
- Don’t Overpay: While reputable brands are key, look for sales. MicroSD cards often go on discount during major shopping events.
Conclusion
Expanding your Nintendo Switch’s storage with a high-quality microSD card is arguably the most essential upgrade for any digital game enthusiast. It eliminates storage anxiety, provides seamless access to your entire game library, and ensures you’re always ready for the next big download. Invest a little now, and enjoy countless hours of uninterrupted gaming without the frustrating “storage full” message.


