How to expand Nintendo Switch storage for more digital games?

The Nintendo Switch, a marvel of portable gaming, comes with a respectable 32GB or 64GB of internal storage depending on the model. While this might seem sufficient for a few downloaded titles, dedicated digital gamers quickly find themselves running out of space. With the ever-growing library of fantastic eShop games and larger game sizes, expanding your Switch’s storage is not just a luxury, but often a necessity.
Why Expand Your Switch’s Storage?
Digital games on the Nintendo eShop are incredibly convenient, but they consume valuable storage. Even physical game cartridges may require significant downloads for updates or DLC. Reaching capacity means constantly deleting and redownloading games, a frustrating process that can interrupt your gaming flow. Expanding your storage ensures you can keep all your favorite titles ready to play at a moment’s notice.
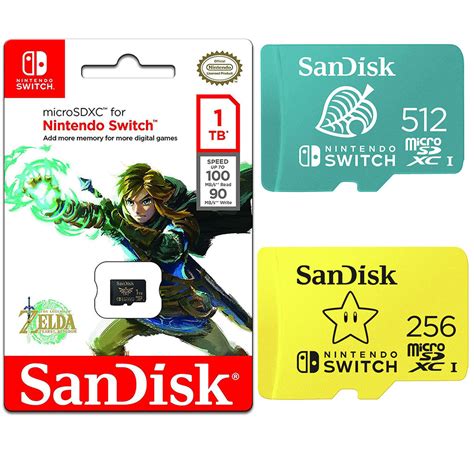
The Essential Solution: MicroSD Cards
Fortunately, expanding your Nintendo Switch storage is incredibly straightforward thanks to its dedicated microSD card slot. The Switch supports microSD, microSDHC, and microSDXC cards, offering a vast range of capacity options. This simple, affordable upgrade will dramatically increase the number of games you can store digitally.
Choosing the Right MicroSD Card
Not all microSD cards are created equal. To ensure the best performance for your Switch, consider these key factors:
- Capacity: While 32GB or 64GB might be a slight upgrade, most users will benefit from 128GB, 256GB, 512GB, or even 1TB cards. The more games you plan to download, the larger the card you’ll need. Think ahead!
- Speed Class: Nintendo recommends using a microSD card with a “UHS-I (Ultra High Speed Phase I) compatible” rating and a read speed of 60-95 MB/s. Look for cards with a “U3” or “V30” speed class rating, or an “A1” or “A2” application performance class rating. These indicate faster read/write speeds, which translate to quicker game loading times and smoother performance. Avoid older, slower cards as they can lead to noticeable delays.
- Brand Reputation: Stick to reputable brands like SanDisk, Samsung, Kingston, or Lexar to ensure reliability and genuine products.
Installing Your New MicroSD Card
The process is incredibly simple:
- Power Off Your Switch: It’s crucial to fully power down your console, not just put it to sleep. Hold down the Power Button for three seconds, then select “Power Options” > “Turn Off.”
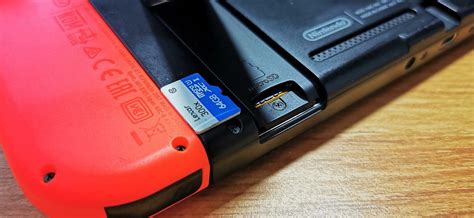
- Locate the Slot: The microSD card slot is located under the kickstand on the back of the Switch console.
- Insert the Card: Gently slide the microSD card into the slot with the label facing away from the console (towards the back of the kickstand) until it clicks into place.
- Power On Your Switch: Turn your Switch back on, and it should automatically recognize the new storage. If it’s a brand-new card, the Switch may prompt you to format it, which is a quick and necessary step.
Managing Your Game Data
Once your new microSD card is installed, your Switch will automatically start saving new downloads to it (provided there’s space). But what about games already stored on your internal memory?
- Move Downloaded Software: You can’t directly “move” individual games from internal storage to the microSD card in the same way you would files on a computer. Instead, you need to “archive” the game data from the internal memory and then redownload it, at which point it will install onto your microSD card. Go to System Settings > Data Management > Move Data Between System / microSD Card.
- Archiving vs. Deleting: Archiving removes the game data but keeps the icon and save data (save data is always stored on internal memory unless backed up to the cloud via Nintendo Switch Online). Deleting removes everything. When you redownload an archived game, it will go to your new microSD card.
- Cloud Saves: Remember that save data is separate from game data. For many games, your save data can be backed up to the cloud if you have a Nintendo Switch Online subscription, offering an extra layer of security.
Final Tips for Optimal Storage
- Regularly Check Storage: Periodically check your “Data Management” section in System Settings to see what’s consuming the most space.
- Delete Unused Games: If you’ve truly finished a game and don’t plan to revisit it, consider archiving or deleting it to free up space.
- Buy Genuine Cards: Be wary of suspiciously cheap microSD cards from unknown sellers. Counterfeit cards are rampant and can lead to data loss or poor performance.
Expanding your Nintendo Switch storage with a high-quality microSD card is a simple, effective, and highly recommended upgrade for any digital game enthusiast. It frees you from the constant worry of running out of space, letting you focus on what truly matters: enjoying your vast library of games without interruption.