


How to fix Nintendo Switch Joy-Con drift?

Joy-Con drift is a prevalent and frustrating problem faced by many Nintendo Switch owners. It occurs when your character or cursor moves on its own, even when you’re not touching the joystick. This phantom input can severely impact gameplay, making precision impossible and sometimes rendering games unplayable. While it can seem like a major hardware failure, there are several steps you can take, ranging from simple software adjustments to more involved hardware repairs, to get your Joy-Cons back in working order.
Understanding Joy-Con Drift
Before diving into fixes, it’s helpful to understand what causes drift. Most commonly, it’s due to wear and tear on the internal components of the joystick module. Tiny dust particles, grime, or even eroded plastic material can get under the sensor, interfering with its ability to accurately detect stick position. Over time, repeated use can also degrade the conductive pads or springs, leading to inconsistent signals.
Initial Software Solutions
Sometimes, the issue isn’t hardware-related but rather a software glitch or calibration error. These steps are quick, easy, and should be your first line of defense.
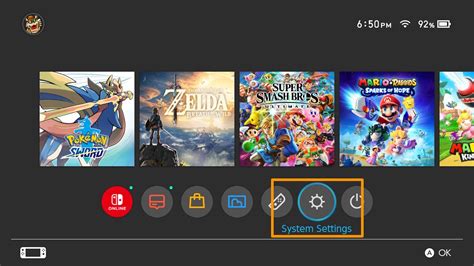
1. Update Nintendo Switch System Firmware
Ensure your Nintendo Switch console is running the latest system software. Updates often include bug fixes and improved peripheral support that might resolve calibration issues.
- Go to System Settings on your Home screen.
- Scroll down to ‘System’.
- Select ‘System Update’.
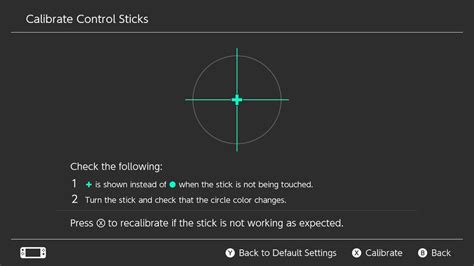
2. Calibrate Your Joy-Cons
Recalibrating your Joy-Cons can often fix minor drift by resetting the stick’s central position.
- From the Home screen, go to System Settings.
- Scroll down and select ‘Controllers and Sensors’.
- Select ‘Calibrate Control Sticks’.
- Follow the on-screen instructions, pressing down on the problematic stick and then following the calibration prompts.
3. Disconnect and Reconnect Joy-Cons
Sometimes, a simple reset of the connection can clear up temporary issues. Detach the Joy-Cons from the console, turn the console off completely, then reattach them and power it back on.
DIY Hardware Fixes (Proceed with Caution)
If software solutions don’t work, the problem is likely hardware-related. These DIY fixes require a bit more effort and care. Attempting these may void your warranty, so proceed at your own risk.
1. Cleaning Under the Joystick Cap
Often, dust and debris are the culprits. You can try cleaning the area around and under the joystick cap without fully disassembling the Joy-Con.
- **Compressed Air:** Use a can of compressed air to blow around the base of the joystick. Hold the stick to one side and spray into the gap, rotating the stick to clean all sides.
- **Isopropyl Alcohol:** For more stubborn grime, use a Q-tip or a small amount of isopropyl alcohol (90% or higher) on a microfiber cloth. Gently work it around the base of the stick while manipulating the stick. Let it dry completely before using.
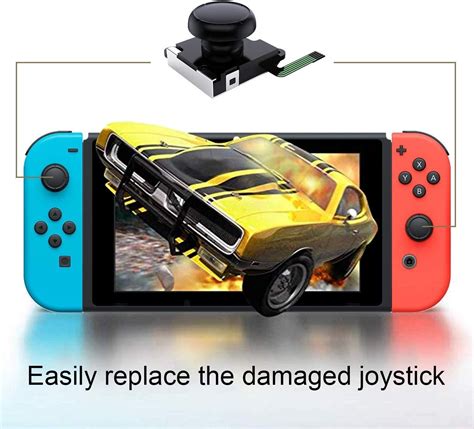
2. Replacing the Joystick Module
If cleaning doesn’t resolve the drift, the internal joystick module itself might be faulty and need replacement. This is a more advanced repair that involves opening the Joy-Con.
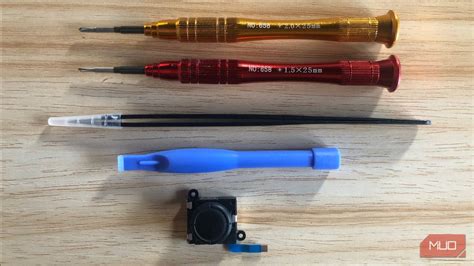
- **Tools Needed:** You’ll typically need a small Phillips head screwdriver, a tri-wing (Y-tip) screwdriver, a spudger, and a replacement joystick module (readily available online).
- **Process:** Carefully follow a reliable online guide or video tutorial. It involves opening the Joy-Con casing, disconnecting the battery, detaching ribbon cables, and unscrewing the old module to replace it with a new one.
- **Caution:** This process requires patience and precision. Be very careful with the delicate ribbon cables and ensure you reassemble everything correctly.
Seeking Official Support or Alternatives
If DIY repairs are not for you, or if they don’t solve the problem, you have other options.
1. Contact Nintendo Support
Nintendo has a repair program for Joy-Con drift, and in many regions, they will repair or replace your Joy-Cons for free, even if they are out of warranty. Check Nintendo’s official support website for your region’s policy and instructions on how to send in your controllers for repair.
2. Consider New Joy-Cons or Third-Party Controllers
If repairs aren’t feasible or you prefer a new experience, purchasing a new pair of Joy-Cons or investing in a reliable third-party controller (like the Nintendo Switch Pro Controller or other licensed alternatives) can be a good solution. These often offer improved ergonomics and sometimes more durable stick mechanisms.

Preventative Measures
While drift can be an inevitable consequence of extensive use, you can take steps to potentially prolong the life of your Joy-Cons:
- Handle your Joy-Cons gently, avoiding excessive force on the sticks.
- Keep your Switch and Joy-Cons in a clean environment to minimize dust ingress.
- Store your Switch in a protective case when not in use.
Conclusion
Joy-Con drift is a common nuisance for Nintendo Switch owners, but it’s far from insurmountable. By following the troubleshooting steps outlined, from simple software fixes to more involved hardware repairs, you stand a good chance of resolving the issue. Remember to weigh the risks and benefits of DIY repairs against official support or purchasing new controllers to find the best solution for your situation.


