


Fix Switch Joy-Con drift quickly at home?
Understanding Joy-Con Drift: A Common Nuisance
Joy-Con drift is a frustratingly common issue for many Nintendo Switch owners. It occurs when your controller registers input even when the analog stick isn’t being touched, causing characters to move on their own, cameras to pan unexpectedly, or selections to skip. This phantom input can severely impact your gaming experience, turning a fun session into a test of patience. Typically, drift is caused by dust, debris, or wear-and-tear accumulating under the analog stick’s mechanism, interfering with its sensors.
Diagnosing the Problem: Is It Really Drift?
Before attempting any fixes, it’s crucial to confirm that you are indeed experiencing Joy-Con drift. Nintendo provides a built-in calibration tool to help you do this.
- Go to the Nintendo Switch HOME Menu.
- Select System Settings > Controllers and Sensors > Calibrate Control Sticks.
- Press down on the control stick you want to test.
- Follow the on-screen prompts to check the stick’s response. If the crosshairs move erratically or don’t stay perfectly centered when the stick is at rest, you have drift.

First Steps: Software Solutions and Simple Cleaning
Sometimes, drift isn’t a hardware failure but a software glitch or minor obstruction. These steps are quick, easy, and require no special tools.
1. Recalibrate Your Joy-Cons
Even if you’ve already checked for drift, recalibrating the sticks can sometimes reset their baseline. Follow the same steps as diagnosing, but this time, perform the full calibration process.
2. Update Your System Firmware
Ensure your Nintendo Switch is running the latest system update. Software bugs can sometimes mimic hardware issues. Go to System Settings > System > System Update.
3. The Compressed Air/Contact Cleaner Method
This is often the most effective non-invasive fix. Dust and debris are prime culprits.
- Compressed Air: Power off your Switch. Gently lift the rubber skirt around the base of the analog stick. Use short bursts of compressed air to blow under the skirt, moving the stick around as you do so to dislodge any trapped particles.
- Electrical Contact Cleaner: For a more thorough cleaning, you can use a small amount of non-conductive electrical contact cleaner (like isopropyl alcohol spray). Apply a tiny amount under the rubber skirt while moving the stick. Let it dry completely for at least 15-30 minutes before powering on your Switch. Make sure to use a product specifically designed for electronics to avoid damage.
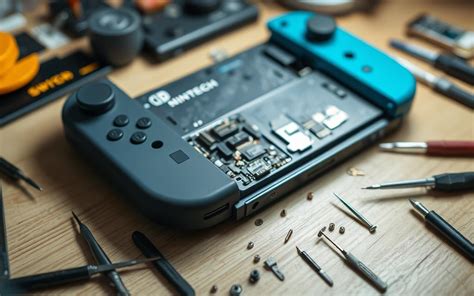
When to Consider a DIY Repair: Replacing the Stick Module
If software updates and cleaning don’t resolve the drift, the analog stick module itself might be worn out and require replacement. This is a more involved process but can be done at home with the right tools.
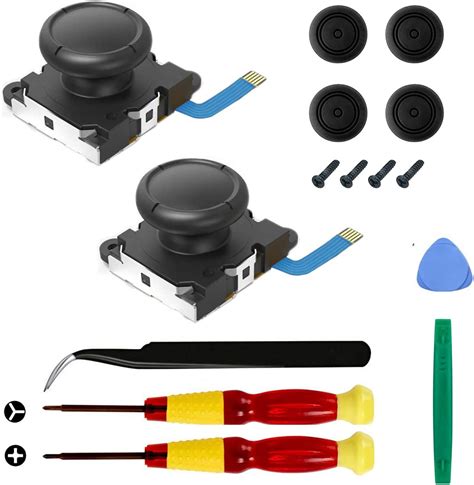
What You’ll Need:
- Replacement Joy-Con analog stick module (available online).
- Small Philips head screwdriver.
- Tri-wing Y00 screwdriver (for Nintendo screws).
- Plastic prying tools or tweezers.
- Optional: Anti-static wrist strap.
General Steps (Proceed with Caution!):
- Power Off: Completely power down your Nintendo Switch.
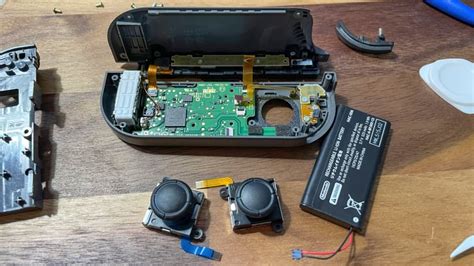
- Open Joy-Con: Use the tri-wing screwdriver to remove the outer screws, then carefully open the Joy-Con casing with a prying tool.
- Disconnect Battery: Locate and carefully disconnect the battery to prevent short circuits.
- Remove Components: Depending on the Joy-Con side, you’ll need to carefully remove the battery, mid-frame, and potentially some ribbon cables to access the analog stick.
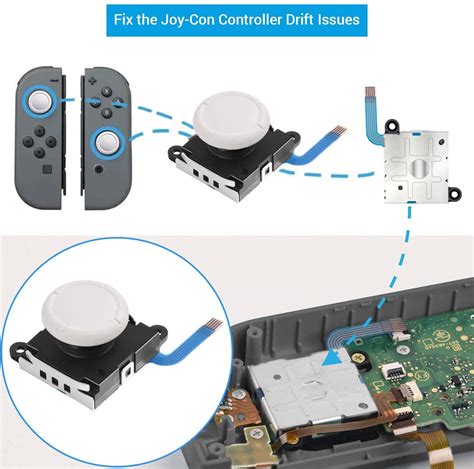
- Replace Stick: Unscrew the faulty analog stick module, gently disconnect its ribbon cable, and install the new module, ensuring the ribbon cable is properly seated and locked.
- Reassemble: Carefully reassemble the Joy-Con, connecting all cables and components in reverse order.
Warning: Opening your Joy-Con will likely void your warranty. There’s also a risk of damaging internal components if not done carefully. Watch detailed video tutorials before attempting this repair.
Preventing Future Drift: Care and Maintenance
While drift can sometimes be inevitable due to manufacturing tolerances, proper care can extend your Joy-Cons’ lifespan:
- Keep Them Clean: Regularly use compressed air around the sticks to prevent dust buildup.
- Gentle Use: Avoid excessive force or ‘mashing’ the analog sticks during intense gaming sessions.
- Storage: Store your Switch and Joy-Cons in a clean, dust-free environment, perhaps in a carrying case.
- Protectors: Some third-party stick covers might offer a slight barrier against debris, but choose them carefully as some can interfere with full stick range.
Conclusion: Is It Worth the DIY Effort?
Fixing Joy-Con drift at home can be a rewarding and cost-effective solution, especially for the more common software and cleaning issues. If a simple cleaning doesn’t work, a DIY module replacement can save you money compared to buying new Joy-Cons. However, always weigh the risks of opening your controller against the cost of professional repair or replacement. For those uncomfortable with DIY repairs, Nintendo does offer official repair services, sometimes even free of charge for drift issues, depending on your region and warranty status.