


Best Switch storage: MicroSD tips for your growing game library?

The Nintendo Switch, with its vast and ever-growing library of incredible games, often presents one common challenge to its owners: storage. While the console comes with 32GB (or 64GB for the OLED model) of internal memory, a significant portion of that is reserved for the system itself, leaving precious little room for digital downloads, game updates, and save data. This quickly becomes a bottleneck for any avid gamer. Fortunately, expanding your Switch’s storage is straightforward, primarily through the use of MicroSD cards.
Why Your Switch Needs More Storage
Many of today’s blockbuster Switch titles can easily consume several gigabytes of space. Games like The Legend of Zelda: Tears of the Kingdom, Pokémon Scarlet/Violet, and even many indie darlings can quickly fill up your internal memory. Digital-only purchases, in particular, demand external storage if you want to keep more than a handful of games installed at a time.

Even if you prefer physical game cartridges, many titles still require substantial updates, DLC, and save data to be stored locally. A MicroSD card isn’t just a luxury; for many, it’s a necessity to fully enjoy the Switch experience without constantly deleting and redownloading games.
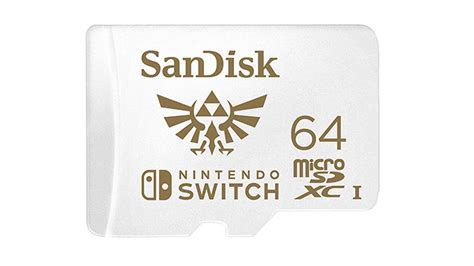
Choosing the Right MicroSD Card for Your Switch
Not all MicroSD cards are created equal. When selecting one for your Nintendo Switch, there are a few key specifications to consider:
Capacity: How Much Space Do You Need?
- 128GB: A good starting point for casual gamers or those who mostly buy physical.
- 256GB: A solid all-rounder, offering a good balance of cost and capacity for most digital-heavy players.
- 512GB: Excellent for dedicated digital collectors who want to download many large games without worry.
- 1TB: The ultimate choice for serious digital hoarders, though more expensive.
Always consider your current and future gaming habits. It’s often better to buy slightly more capacity than you think you need to avoid upgrading again soon.
Speed: Look for UHS-I (U1 or U3)
The Nintendo Switch supports UHS-I (Ultra High Speed Phase I) MicroSD cards. While UHS-II cards exist and are faster, the Switch cannot take advantage of their higher speeds, making them an unnecessary expense. Look for cards with:
- UHS Speed Class 1 (U1): Offers a minimum write speed of 10 MB/s.
- UHS Speed Class 3 (U3): Provides a minimum write speed of 30 MB/s, which is generally recommended for optimal performance with larger game files and faster loading times.
You’ll also see an ‘A1’ or ‘A2’ rating, which indicates ‘Application Performance Class.’ While A2 offers better random read/write speeds, the real-world difference for Switch gaming is often negligible compared to A1, especially given the Switch’s UHS-I limitations. Focus on U3 for the best balance.
Reliable Brands
Stick to reputable brands like SanDisk, Samsung, PNY, and Kingston. These brands are known for their quality, reliability, and provide robust warranties. Avoid unbranded or suspiciously cheap cards, as they often have slower speeds or false capacities.
Installing Your MicroSD Card
Installing a MicroSD card into your Switch is incredibly simple:
- Power off your Nintendo Switch completely.
- Flip up the kickstand on the back of the console.
- Locate the MicroSD card slot beneath the kickstand.
- Insert the MicroSD card into the slot until it clicks into place, with the label facing the same direction as the screen.
- Close the kickstand and power on your Switch.
The Switch will automatically detect and format the card (if necessary), ready for use. All new digital game downloads and updates will default to the MicroSD card until it’s full.
Tips for Managing Your Growing Game Library
1. Monitor Your Storage
Go to System Settings > Data Management to see how your storage is being used by software, save data, and screenshots/videos. This helps you identify what’s taking up the most space.
2. Archive vs. Delete Software
When you run out of space, the Switch gives you two options for software:
- Archive Software: This deletes the game data but keeps the icon on your Home screen and preserves your save data. You can redownload the game at any time from the eShop or your user page. This is the recommended option for games you might want to play again.
- Delete Software: This removes the game data and its icon from your Home screen. Your save data will still be preserved on the console’s internal memory. You’ll need to search for it in the eShop to redownload.
3. Move Data (If Necessary)
While the Switch doesn’t have a direct ‘move to SD card’ option for already-installed games, you can archive a game from internal memory and then redownload it, which will then install it onto your MicroSD card if there’s space.
4. Physical vs. Digital Game Storage
Remember that physical game cartridges store the core game data, but all patches, updates, DLC, and save data will still take up space on either your console’s internal memory or the MicroSD card. If you’re short on MicroSD space, consider purchasing more physical games.
5. Back Up Your Save Data
While save data is typically stored internally (and backed up to the cloud with a Nintendo Switch Online subscription), it’s a good practice to ensure you have NSO for this crucial feature, especially if you ever need to replace your console or MicroSD card.
Future-Proofing Your Storage
As Nintendo continues to release exciting new games and updates, your storage needs are likely to grow. Investing in a larger capacity MicroSD card upfront, like 256GB or 512GB, can save you the hassle of managing space later on. While the upfront cost is higher, the convenience of not having to constantly delete and redownload games is invaluable for a seamless gaming experience.

By understanding the different MicroSD card types and implementing smart data management strategies, you can ensure your Nintendo Switch has plenty of room for all the adventures, challenges, and fun that await you in its ever-expanding digital universe.