

How to fix Joy-Con drift on Nintendo Switch controllers?

Understanding Joy-Con Drift: The Frustrating Reality
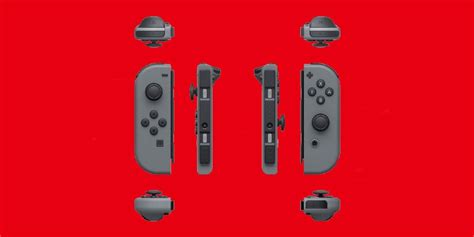
Joy-Con drift is a prevalent problem for many Nintendo Switch owners, manifesting as unintended movement or input even when your fingers aren’t touching the joystick. This can lead to characters moving on their own, camera angles shifting without command, or menu selections going haywire. It’s a frustrating experience that can significantly impact gameplay and controller longevity.
Typically, drift is caused by wear and tear on the joystick’s internal components, where tiny particles or debris can accumulate, interfering with the electrical contacts. Over time, the conductive pads can also degrade, leading to inconsistent readings. Understanding the root cause is the first step toward finding an effective solution.
Official Nintendo Solutions: Warranty and Repair
Before attempting any DIY fixes, it’s always wise to explore official channels. Nintendo has acknowledged the Joy-Con drift issue and, in many regions, offers free repairs even outside of the standard warranty period. This service typically involves sending your faulty Joy-Cons to Nintendo for professional assessment and repair or replacement.
Checking Warranty Status and Initiating a Repair
- Visit Nintendo’s Support Website: Navigate to your regional Nintendo support page and search for information on Joy-Con repair services.
- Contact Customer Support: Speak directly with a representative who can guide you through the repair process, inform you about eligibility, and provide shipping instructions.
- Document Your Issue: Be prepared to describe the problem in detail and provide your console’s serial number.
While this option might take some time (shipping and repair can take a few weeks), it’s often the safest and most reliable way to get your Joy-Cons fixed without risking further damage.

Software-Based Solutions: Calibration and Updates
Sometimes, what appears to be drift could be a software calibration issue rather than a hardware fault. Nintendo provides built-in tools to recalibrate your Joy-Cons and ensure their firmware is up-to-date.
Recalibrating Your Joy-Cons
- From the Switch HOME Menu, go to System Settings (gear icon).
- Scroll down and select ‘Controllers and Sensors’.
- Choose ‘Calibrate Control Sticks’.
- Follow the on-screen instructions to select the drifting stick and perform the calibration. This usually involves tilting the stick in a circle and then pressing it down.
Updating Controller Firmware
- In ‘Controllers and Sensors’, select ‘Update Controllers’.
- Ensure your Switch is connected to the internet.
- The system will check for and apply any available firmware updates for your Joy-Cons.
Performing these steps can sometimes resolve minor drift issues or confirm that the problem is indeed hardware-related.
DIY Hardware Fixes: Cleaning and Replacement
If official repairs aren’t an option or you prefer a more immediate solution, there are several DIY hardware methods you can try. These range from simple cleaning to more involved component replacement.
Cleaning with Contact Cleaner or Compressed Air
Often, debris lodged under the joystick’s skirt is the culprit. A quick clean can sometimes resolve the issue:
- Gather Supplies: You’ll need electronic contact cleaner (like WD-40 Specialist Contact Cleaner, not regular WD-40) or compressed air.
- Lift the Rubber Skirt: Gently lift the rubber skirt around the base of the control stick.
- Apply Cleaner/Air: Spray a small amount of contact cleaner directly under the skirt, wiggling the stick around to allow the cleaner to seep in. Alternatively, use short bursts of compressed air to dislodge debris.
- Test: Wait for the cleaner to dry (if used) and then test your Joy-Cons. Repeat if necessary.
Caution: Always ensure your Joy-Cons are powered off when performing this. Be sparing with liquids to avoid internal damage.
Replacing the Joystick Module
For persistent drift, replacing the entire joystick module is a more advanced DIY solution. This requires specific tools (tri-wing screwdriver, Phillips head screwdriver, spudger) and a replacement joystick module, which can be purchased online.
Warning: Opening your Joy-Cons will likely void any remaining warranty. Proceed with extreme caution, as internal components are delicate and can be easily damaged. There are numerous detailed video tutorials online that can guide you through each step of the replacement process.
After replacing the module, remember to perform a joystick calibration as described in the software-based solutions section.

Prevention and Maintenance Tips
While drift can sometimes feel inevitable, certain practices can help extend the life of your Joy-Cons:
- Handle with Care: Avoid excessive force or aggressive movements with the joysticks.
- Keep Clean: Regularly wipe down your controllers to prevent dust and grime buildup.
- Store Properly: When not in use, keep Joy-Cons in a clean, dust-free environment.
- Use Third-Party Grips: Some players find that using a grip or case that covers the joystick bases can help prevent debris ingress.
Conclusion
Joy-Con drift is a frustrating but often fixable issue. Whether you opt for Nintendo’s official repair service, try a software recalibration, or dive into DIY hardware solutions, there are multiple avenues to get your Nintendo Switch controllers back in perfect working order. Choose the method that best suits your comfort level and technical expertise, and get back to enjoying your games without unwanted ghost inputs.