


Which microSD card for Switch? Optimize storage for your digital game library.
The Nintendo Switch is a marvel of portable gaming, but its Achilles’ heel for many users is its limited internal storage. With an ever-growing library of fantastic digital-only titles and large game updates, the console’s 32GB (or 64GB for the OLED model) internal memory quickly fills up. To truly optimize your Switch experience and avoid constant game deletions, investing in a reliable microSD card is essential.
Why Your Nintendo Switch Needs a microSD Card
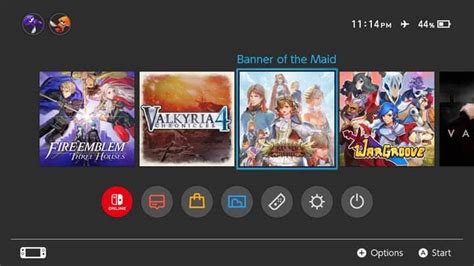
While the Switch offers some internal storage, modern games can be massive. Titles like The Legend of Zelda: Tears of the Kingdom or Pokémon Scarlet and Violet can easily consume over 15GB each. If you prefer buying digital games from the eShop, or even if you primarily buy physical cartridges (which still often require significant update data and DLC downloads), you’ll hit a storage wall sooner rather than later. A microSD card dramatically expands your storage capacity, allowing you to keep dozens, if not hundreds, of games ready to play at a moment’s notice.
Key Factors When Choosing a Switch microSD Card
Not all microSD cards are created equal. To ensure optimal performance and value for your Switch, consider these crucial factors:
1. Capacity: How Much Storage Do You Really Need?
- 128GB: A good starting point for casual gamers with a few digital titles. It’s an affordable upgrade.
- 256GB: The sweet spot for most users. It offers ample space for a significant digital library without breaking the bank.
- 512GB: Recommended for avid digital collectors or those who want to future-proof their storage. It holds a vast number of games.
- 1TB or More: For the ultimate digital hoarders. While expensive, it means you’ll likely never worry about storage again. The Switch officially supports up to 2TB, though 1TB cards are currently the largest widely available and practical option.
Consider your gaming habits: Do you buy many digital games? Do you download lots of free-to-play titles? Are you planning to keep games for a long time or delete them after completion?
2. Speed: Don’t Compromise on Performance
This is where things can get technical, but it’s vital for smooth gameplay and faster loading times. The Nintendo Switch supports the UHS-I (Ultra High Speed Phase I) interface, meaning it can handle theoretical speeds up to 104 MB/s. It does NOT support the faster UHS-II interface, so don’t pay extra for UHS-II cards as you won’t get the benefit.
-
UHS Speed Class (U1 vs. U3):
- U1 (Speed Class 1): Guarantees a minimum sequential write speed of 10 MB/s. Acceptable, but not ideal.
- U3 (Speed Class 3): Guarantees a minimum sequential write speed of 30 MB/s. This is highly recommended for the Switch, offering noticeably faster game loading and data transfers.
-
Application Performance Class (A1 vs. A2):
- A1: Optimized for running apps and provides good random read/write speeds, which are crucial for games.
- A2: An even faster standard for app performance. While the Switch might not fully utilize A2’s peak random performance, A2 cards are typically U3-rated and offer excellent overall speed.
Recommendation: Look for a card that is at least a UHS-I, U3, and A1 or A2 rated. This combination ensures the best balance of speed and compatibility with your Switch.

3. Brand and Reliability
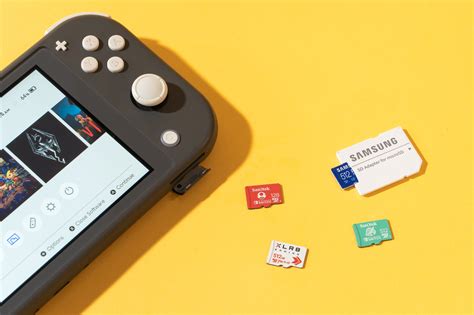
Stick to reputable brands like SanDisk, Samsung, Western Digital (WD), or Lexar. These brands are known for their reliability, durability, and consistent performance. Beware of suspiciously cheap, unbranded cards, which often have fake capacities or poor performance that can lead to data loss or corrupt game files.
Recommended microSD Cards for Nintendo Switch
Given the above factors, here are general recommendations:
- SanDisk Ultra / Extreme: Both are excellent choices. The Extreme series offers slightly better performance (U3, A2) and is often competitively priced.
- Samsung EVO Select / EVO Plus: Another highly reliable and performant option, typically U3 and A2 rated.
- Lexar PLAY: Specifically designed for gaming, these cards are U3 and A2 rated, providing great value.
Always check the product specifications to confirm the UHS Speed Class (U1/U3) and Application Performance Class (A1/A2) before purchasing.

Installing and Managing Your microSD Card
- Power Off: Always power down your Switch completely before inserting or removing the microSD card.
- Insert: The microSD card slot is located under the kickstand on the back of the console. Insert the card label-side up until it clicks into place.
- Format: Your Switch will automatically prompt you to format the card if it’s new. If not, you can format it via System Settings > System > Formatting Options > Format microSD Card.
- Manage Data: The Switch will prioritize downloading new games and updates to the microSD card. You can also move existing data between the internal memory and the microSD card via System Settings > Data Management.
Conclusion
Upgrading your Nintendo Switch’s storage with a quality microSD card is one of the best investments you can make for your gaming experience. By choosing a card with adequate capacity and a U3/A1 or A2 speed rating from a reputable brand, you’ll unlock faster loading times, seamless game management, and the freedom to grow your digital game library without limits. Say goodbye to deleting games and hello to an optimized, ready-to-play collection!


