


What’s the best microSD card for Nintendo Switch to maximize game storage?

Why Your Nintendo Switch Needs a Storage Upgrade
The Nintendo Switch, a marvel of portable gaming, comes with a rather modest internal storage of 32GB (or 64GB for the OLED model). While this is enough for a few small indie titles, it quickly becomes insufficient once you start downloading larger AAA games or multiple digital titles from the eShop. Many modern Switch games can easily take up 10-20GB, making a microSD card an essential accessory for any serious Switch owner looking to maximize their game library.
Expanding your storage with a high-quality microSD card ensures you never have to delete beloved games to make room for new adventures. It also helps future-proof your console as more expansive titles are released.
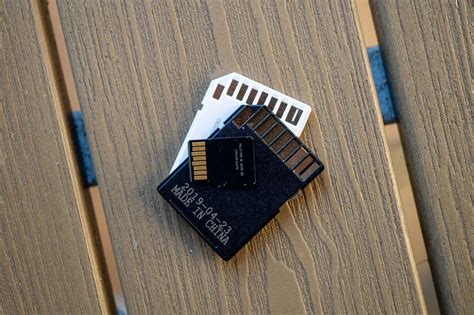
Essential Factors for Choosing a Switch microSD Card
Not all microSD cards are created equal, and choosing the right one for your Switch involves considering a few key specifications:
Speed: UHS-I U3 is Key
The Nintendo Switch supports the UHS-I (Ultra High Speed Phase I) standard, which theoretically allows for transfer speeds up to 104 MB/s. Within UHS-I, you’ll see different speed classes:
- UHS Speed Class 1 (U1): Guarantees a minimum write speed of 10 MB/s.
- UHS Speed Class 3 (U3): Guarantees a minimum write speed of 30 MB/s.
For optimal game loading times and overall performance on your Switch, a U3 rated card is highly recommended. While some cards might also feature an A1 or A2 (App Performance Class) rating, the Switch doesn’t fully utilize these specific optimizations for app loading, so focusing on the U3 speed class for general game data transfer is more important. Look for cards prominently displaying ‘UHS-I’ and ‘U3’.
Capacity: How Much is Enough?
MicroSD cards come in various capacities, from 64GB up to a whopping 1.5TB. The ideal capacity depends on your gaming habits:
- 128GB – 256GB: Good for casual gamers who buy mostly physical cartridges but download a few digital titles or DLC.
- 400GB – 512GB: An excellent sweet spot for most digital-first gamers. This allows for dozens of large titles and many smaller ones.
- 1TB or more: For hardcore digital collectors who want virtually unlimited storage without managing their library. Keep in mind that as capacity increases, so does the price.
Consider your current game library size and how many new games you anticipate purchasing digitally in the future.
Reliability & Brand Reputation
Sticking with reputable brands ensures you’re getting a reliable product with accurate speed ratings and a good warranty. Top brands known for quality microSD cards include SanDisk, Samsung, and Lexar.
Cost
While speed and capacity are important, cost always plays a role. It’s often worth paying a little extra for a U3 card from a trusted brand, as cheaper, off-brand cards can offer inconsistent performance or fail prematurely.

Our Top microSD Card Recommendations for Nintendo Switch
Based on the criteria above, here are some of the best microSD cards that consistently deliver excellent performance on the Nintendo Switch:
- SanDisk Extreme / Extreme Pro: Often considered the gold standard. These U3 cards offer excellent read/write speeds, ensuring quick game loading and smooth performance. They come in a wide range of capacities up to 1TB+.
- Samsung EVO Select / EVO Plus: Another highly reliable option. Samsung’s EVO line offers strong U3 performance and competitive pricing, available in various capacities.
- Lexar Play: Specifically designed for gaming and media, the Lexar Play cards are U3 rated and provide great value, often at a slightly lower price point than SanDisk or Samsung, without compromising much on performance.
All these options meet or exceed the Switch’s requirements for a smooth gaming experience.
Installing and Managing Your Switch microSD Card
Installing a microSD card in your Nintendo Switch is straightforward:
- Turn off your Nintendo Switch completely (hold down the power button and select ‘Power Options’ > ‘Turn Off’).
- Open the kickstand on the back of the console to reveal the microSD card slot.
- Insert the microSD card into the slot with the label facing down, pushing until it clicks into place.
- Close the kickstand and power on your Switch.
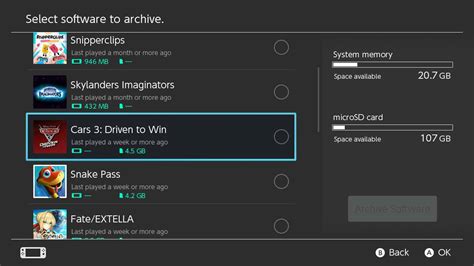
The Switch will automatically detect the new storage. You can then manage your game data via System Settings > Data Management. You can move downloaded software between internal storage and the microSD card, or archive software to free up space without deleting save data.
Maximize Your Switch Gaming Experience
Investing in a high-quality microSD card is one of the best upgrades you can make for your Nintendo Switch. By choosing a U3 rated card from a reputable brand and selecting a capacity that fits your needs, you’ll unlock a world of expansive digital libraries without the frustration of constant data management. Enjoy uninterrupted gaming and never miss out on new adventures because of storage limitations!


