


What are the best methods to free up Nintendo Switch storage for new games?

The Ever-Growing Need for Nintendo Switch Storage
The Nintendo Switch, while an incredible portable console, often presents its owners with a common challenge: storage limitations. With game sizes continuously expanding and a thriving digital storefront, it’s easy to fill up your console’s internal memory quickly. Fortunately, there are several effective methods to free up space, ensuring you’re always ready for the next big release.
1. Archiving or Deleting Software
This is arguably the quickest way to reclaim significant chunks of space. The Switch offers two primary options for removing software:
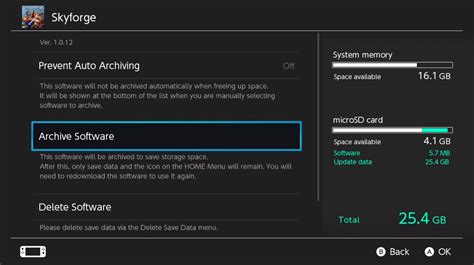
- Archive Software: This option deletes the game data itself but keeps its icon on your Home menu. Your save data remains untouched, allowing you to re-download and continue playing the game later without losing progress. This is ideal for games you might want to play again in the future but aren’t currently active with.
- Delete Software: This option removes both the game data and its icon from your Home menu. Similar to archiving, your save data is typically preserved on the console’s internal memory (unless you specifically delete save data separately). Use this for games you’re confident you won’t play again, or for demos.
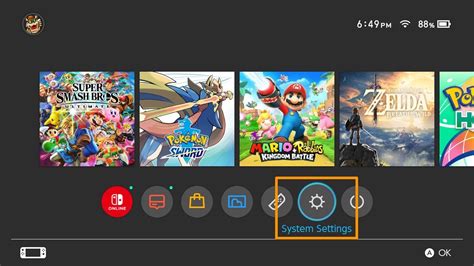
To do this, navigate to System Settings > Data Management > Manage Software. Select the game you wish to remove and choose ‘Archive Software’ or ‘Delete Software’.
2. Managing Your Save Data (with caution)
While game save data typically takes up very little space compared to game software, it’s worth understanding how it works. Save data is always stored on the console’s internal memory and cannot be moved to a microSD card. If you have a Nintendo Switch Online subscription, your save data is also backed up to the cloud.
Deleting save data is generally not recommended unless you are absolutely certain you will never play that game again and don’t need its progress. Once deleted, it’s often irrecoverable without a cloud backup. You can manage save data under System Settings > Data Management > Delete Save Data. Proceed with extreme care.
3. Investing in a High-Capacity microSD Card
This is by far the most impactful method for expanding your Switch’s storage. The Nintendo Switch supports microSD, microSDHC, and microSDXC cards up to 2TB (though 1TB is currently the largest commercially available). Installing a large microSD card means all new digital game downloads and updates will automatically be stored there until it’s full.
- Choose the Right Card: Look for microSDXC cards with a fast read/write speed (UHS-I compatible with a speed class of 10 or higher is recommended for optimal performance).
- Installation: Simply open the kickstand on the back of your Switch and insert the card into the slot. The console will recognize it automatically.
- Transferring Data: While you can’t directly move existing game data from internal memory to the microSD card, you can re-download games to the card once it’s installed.
4. Digital vs. Physical Games: A Storage Perspective
Your choice between digital and physical game purchases can significantly impact your storage needs. Physical game cartridges require minimal internal storage, usually only for save data, updates, and DLC. Digital games, however, download the entire game to your console’s internal memory or microSD card.
If storage is a constant concern, consider buying physical versions of larger games you intend to play for extended periods. Save your digital purchases for smaller indie titles or games you access frequently.
5. Regularly Check Your Storage Usage
Understanding what’s taking up the most space can help you make informed decisions. Your Switch provides a clear breakdown of storage usage:
Go to System Settings > Data Management. Here you can see how much space is being used by software, save data, and screenshots/videos on both your console’s internal memory and your microSD card.
This screen also allows you to quickly access the ‘Manage Software’ and ‘Delete Save Data’ options, making it a central hub for storage management.
6. Clear Out Screenshots and Video Captures
While individual screenshots are small, hundreds or thousands of them (especially video captures) can accumulate and take up a surprising amount of space over time. Regularly review and delete old or unwanted captures:
From the HOME Menu, go to the Album. You can select multiple images/videos to delete or delete them one by one. If you have a microSD card, you can also transfer captures to your computer for long-term storage, freeing up space on your console.
Conclusion
Proactively managing your Nintendo Switch’s storage is key to a hassle-free gaming experience. Whether it’s regularly archiving unused games, investing in a spacious microSD card, or simply being mindful of your digital purchases, these methods will ensure you always have enough room for new adventures and essential game updates. Make it a habit to check your storage usage and tidy up, keeping your Switch ready for anything.


