


Switch storage full? Best microSD for games & installation tips.
Why Your Switch Needs More Storage
The Nintendo Switch, whether it’s the original, Lite, or OLED model, comes with limited internal storage—32GB for the original and Lite, and 64GB for the OLED. While this might seem sufficient at first, digital game downloads, game updates, and screenshots can quickly eat through that space. Many AAA titles alone can be 10GB, 20GB, or even more, making extra storage an absolute necessity for any serious Switch owner.
When your storage is full, you’ll be faced with difficult choices: delete games you love, archive crucial save data, or forgo downloading new releases. The solution is simple and effective: investing in a good quality microSD card. This small accessory can instantly multiply your available space, allowing you to carry your entire game library wherever you go.
Choosing the Best microSD Card for Your Switch
Not all microSD cards are created equal. For optimal performance with your Nintendo Switch, you need to consider a few key factors: speed, capacity, and brand reliability.
Speed Matters: UHS-I, A1, and V30 Explained
- UHS-I (Ultra High Speed Phase I): The Switch supports UHS-I cards, which are generally faster than older standards. Look for the ‘I’ symbol on the card.
- Application Performance Class (A1 or A2): These ratings indicate how well a card handles random read/write operations, which are crucial for loading games quickly. A1 cards offer good performance, while A2 cards are even faster, though the difference might be less noticeable on the Switch compared to other devices.
- Video Speed Class (V30): While primarily for video recording, a V30 rating guarantees a minimum sustained write speed of 30MB/s, ensuring your games install and update efficiently.
Generally, a UHS-I card with an A1 or A2 rating and a V30 speed class will provide an excellent balance of performance and value for your Switch.
Capacity: How Much Do You Need?
The ideal capacity depends on your gaming habits:
- 128GB-256GB: Good for casual gamers who mostly play physical cartridges but want space for digital indies and updates.
- 256GB-512GB: Recommended for most digital-first gamers, offering ample space for several large titles and many smaller ones.
- 512GB-1TB: Ideal for avid collectors of digital games and those who want to download every title that catches their eye without worrying about space.
Keep in mind that while the Switch supports up to 2TB, cards above 1TB are often disproportionately expensive for the average user.
Top Recommended Brands
Stick to reputable brands to ensure reliability and performance. Some of the best include:
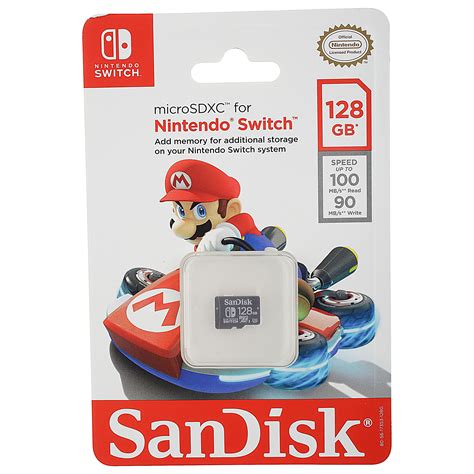
- SanDisk: Known for their ‘Nintendo Licensed’ cards, which are often a safe and reliable choice, though any equivalent SanDisk Ultra or Extreme will perform well.
- Samsung: Their EVO Select or EVO Plus lines offer excellent speed and value.
- Lexar: Another strong contender, often providing good performance at competitive prices.
- Kingston: Reliable and widely available options.
Installation Tips and Data Management
Installing a microSD card in your Switch is straightforward, but there are a few things to keep in mind.
Step-by-Step Installation
- Power Off Your Switch: Completely shut down your console (hold the power button, then select ‘Power Options’ > ‘Turn Off’). Do NOT just put it to sleep.
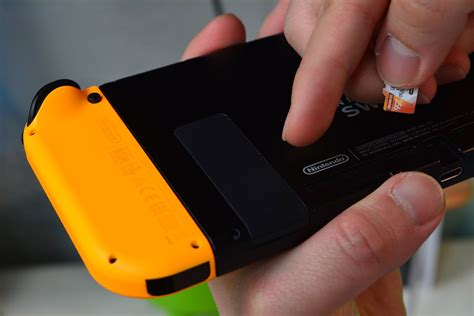
- Locate the Slot: The microSD card slot is usually under the kickstand on the back of the Switch.
- Insert the Card: Gently push the microSD card into the slot until it clicks into place. Ensure it’s facing the correct way (contacts down for most cards).
- Power On: Turn your Switch back on. It should automatically detect and format the card if it’s new.
- Verify Storage: Go to System Settings > Data Management to confirm your new storage is recognized.
Managing Your Games and Data
- Automatic Downloads: Once installed, new digital games and updates will automatically download to your microSD card.
- Moving Software: You can move existing downloaded software from internal memory to the microSD card. Go to System Settings > Data Management > Move Data Between System / microSD Card. Note that save data always remains on the console’s internal memory and cannot be moved.
- Archiving vs. Deleting: If you need to free up space, archiving software removes the game data but keeps its icon on your home screen and preserves your save data. Deleting removes everything. Always choose ‘Archive Software’ first unless you’re absolutely sure you won’t play the game again.
- Digital vs. Physical: Remember that physical game cartridges still require space for updates and DLC. Even if you buy most games physically, a microSD card is still valuable.
Final Thoughts
Upgrading your Nintendo Switch’s storage with a reliable microSD card is one of the most impactful improvements you can make to your gaming experience. It removes the constant worry of running out of space, lets you keep more of your favorite games installed, and ensures new titles can be downloaded without hassle. By choosing a reputable brand and the right capacity, you’ll be set for countless hours of uninterrupted gaming enjoyment.


