


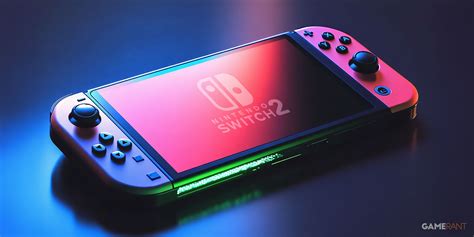
Running out of Nintendo Switch game space? Best microSD card upgrade guide.

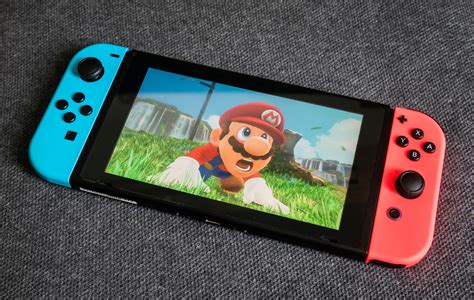
The Nintendo Switch, a marvel of portable gaming, boasts an impressive library of digital titles. However, with only 32GB of internal storage (or 64GB for the OLED model), players quickly find themselves battling the dreaded “not enough space” message. This is where a trusty microSD card becomes an essential upgrade, transforming your console into a vast repository for all your gaming adventures.
Why Your Nintendo Switch Needs a MicroSD Card Upgrade
While some physical game cartridges store their data entirely on the cart, many popular titles still require significant downloads for updates, DLC, or even the full game if purchased digitally. Games like The Legend of Zelda: Tears of the Kingdom, Pokémon Scarlet/Violet, and Super Smash Bros. Ultimate can quickly gobble up your limited internal space. Relying solely on the Switch’s built-in storage means constantly deleting and re-downloading games – a time-consuming and frustrating cycle.
A microSD card instantly expands your Switch’s capacity, allowing you to store dozens, if not hundreds, of digital games, screenshots, and video captures without hassle. It’s a plug-and-play solution that significantly enhances your gaming experience.
Understanding MicroSD Card Specifications for Switch
Not all microSD cards are created equal, and choosing the right one for your Switch involves understanding a few key specifications:
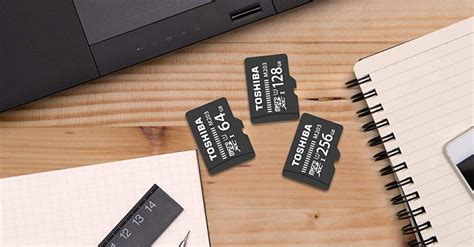
- Storage Capacity (GB/TB): The Switch supports cards up to 2TB (though 1TB is currently the largest commercially available). Common capacities range from 64GB to 512GB, offering a good balance of space and cost.
- Speed Class: This indicates the minimum write speed. For the Switch, look for cards rated at UHS-I (Ultra High Speed Phase I) with a Speed Class 10 (U1) or, even better, Speed Class 3 (U3). The Switch can utilize UHS-I speeds up to 100MB/s, so higher speed classes like UHS-II or UHS-III won’t offer a performance boost.
- Application Performance Class (A1/A2): While primarily for Android apps, A1 and A2 ratings indicate good random read/write performance, which can slightly benefit game loading times. A1 is usually sufficient and more common for Switch use.
Focus on reputable brands like SanDisk, Samsung, PNY, and Lexar to ensure reliability and performance. Avoid no-name cards, as they often have slower speeds or fail prematurely.
Choosing the Right Capacity: How Much Space Do You Need?
The ideal microSD card capacity depends on your gaming habits:
- 64GB-128GB: Suitable for casual players who mainly buy physical games or only have a few digital titles.
- 256GB-512GB: The sweet spot for most gamers. This capacity allows for a substantial digital library, including several large AAA titles and many smaller indie games.
- 1TB or More: For dedicated digital-only players or those who want to download every game they own without ever thinking about space. While more expensive, it offers ultimate peace of mind.
Consider future purchases. Digital game sizes are only getting larger, so it’s often wise to go a step above what you think you currently need.

Installation and Setup: Getting Your New Card Ready
Upgrading your Switch’s storage is incredibly simple:
- Power Off Your Switch: Always ensure your console is completely shut down (hold the power button for three seconds, then select “Power Options” > “Turn Off”).
- Locate the MicroSD Card Slot: This is typically found under the kickstand on the back of the Switch console.
- Insert the Card: Gently push the microSD card into the slot until it clicks into place. Ensure it’s facing the correct way (usually contacts down, but check your card/slot for orientation).
- Power On Your Switch: The console will detect the new card and may prompt you to format it. Follow the on-screen instructions. Formatting will erase any existing data on the card, so use a new or empty card.
Once formatted, your Switch will automatically start using the microSD card for new game downloads, updates, and screenshots. Existing games on internal storage will remain there, but you can move them to the SD card via System Settings if desired (Data Management -> Move Data Between System / microSD Card).

Maximizing Your Storage Investment
With your new microSD card installed, you can download games without hesitation. Keep an eye on sales on the eShop and expand your digital library knowing you have the space. Remember to always back up important save data to the cloud (with a Nintendo Switch Online subscription) as game save data is typically stored internally and not on the microSD card itself.
Conclusion
Upgrading your Nintendo Switch’s storage with a high-quality microSD card is one of the most impactful and straightforward enhancements you can make. It liberates you from storage anxieties, letting you focus on what truly matters: enjoying your vast collection of games. Choose wisely based on your budget and gaming habits, and unlock the full potential of your portable gaming powerhouse.


