


Quick fix for Joy-Con drift on Nintendo Switch without buying new ones?
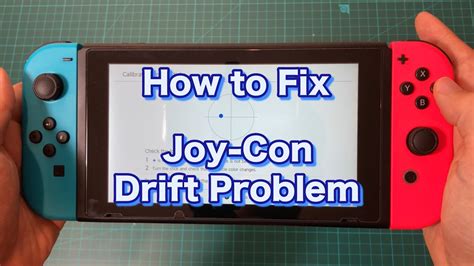
Nintendo Switch Joy-Con drift is a frustratingly common issue where your character or cursor moves on its own, even when you’re not touching the joystick. It can turn an enjoyable gaming session into a battle against phantom inputs. Before you rush to buy new Joy-Cons, which can be expensive, there are several effective methods you can try to fix the drift yourself.
Understanding Joy-Con Drift: The Root Cause
The primary reason for Joy-Con drift is wear and tear on the internal components of the joystick. Over time, dust, debris, or tiny particles can get lodged under the joystick’s base, interfering with the electrical contacts. Additionally, the carbon pads inside the joystick module can wear down, leading to inconsistent readings. While Nintendo has acknowledged the issue and even offers free repairs in some regions, many gamers prefer a quick, at-home solution.
Step 1: Software Solutions – The Easiest Fixes
Before diving into physical repairs, always start with software-based troubleshooting. These methods are simple, risk-free, and surprisingly effective for minor drift issues.
Update Your Switch System and Joy-Con Firmware
Ensure both your Nintendo Switch console and your Joy-Cons are running the latest firmware. Nintendo sometimes releases updates that can improve controller performance and address minor bugs.
- Go to System Settings on your Switch.
- Scroll down to “System.”
- Select “System Update” to check for console updates.
- To update Joy-Cons, navigate to “Controllers and Sensors” and then “Update Controllers.”
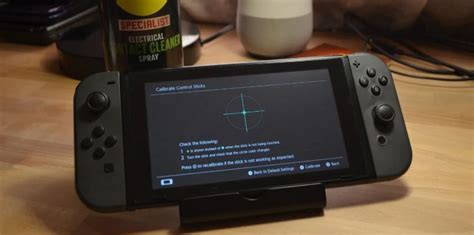
Calibrate Your Joy-Cons
Calibration helps your Switch understand the neutral position and full range of motion for your joysticks.
- From System Settings, go to “Controllers and Sensors.”
- Select “Calibrate Control Sticks.”
- Follow the on-screen prompts, pressing in the stick experiencing drift and then rotating it in a full circle.
Step 2: Hardware Solutions – DIY Cleaning and Minor Repairs
If software fixes don’t work, it’s time to get a little hands-on. These methods involve cleaning or minor adjustments and don’t require advanced tools.
The Contact Cleaner Method
This is one of the most popular and often successful DIY fixes. You’ll need electronic contact cleaner (like WD-40 Specialist Contact Cleaner) and a soft cloth.
- Power off your Switch and detach the Joy-Cons.
- Gently lift the rubber skirt at the base of the problematic joystick (you might need a thin tool like a plastic spudger or even a fingernail).
- Spray a tiny amount of contact cleaner directly under the skirt, into the base of the joystick.
- Rotate the joystick vigorously in all directions for about 30 seconds to distribute the cleaner.
- Allow it to dry completely (5-10 minutes) before reattaching and testing.
Repeat if necessary, but avoid over-spraying as it can damage internal components.
The Cardboard/Paper Shim Fix
Sometimes, the issue is loose contact due to slight manufacturing tolerances or wear. A small shim can apply pressure and restore contact.
- You’ll need a tiny piece of thin cardboard or thick paper (e.g., from a business card).
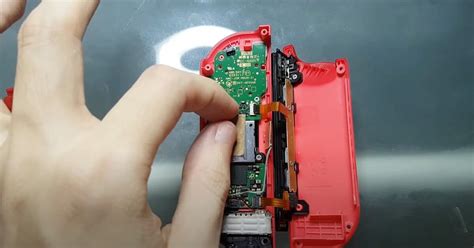
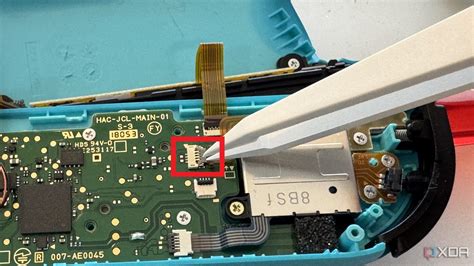
- Carefully open the Joy-Con casing (this requires a tri-wing screwdriver).
- Locate the joystick module.
- Place the tiny shim between the joystick module and the main circuit board to create a tighter connection.
- Reassemble carefully.
Note: Opening your Joy-Con voids its warranty, so proceed with caution.
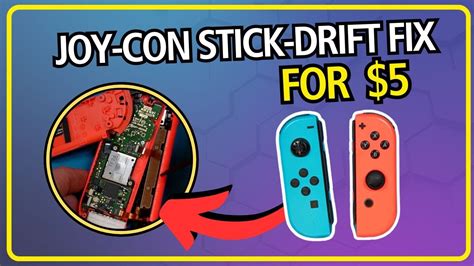
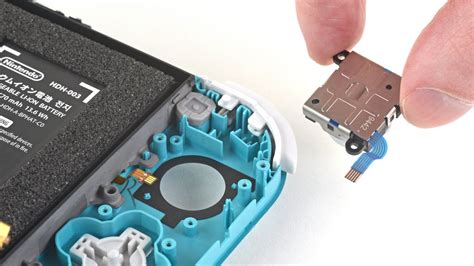
Step 3: Replacing the Joystick Module (Advanced DIY)
If cleaning and shims don’t resolve the issue, the internal joystick module itself might be permanently damaged or worn out. Fortunately, replacement modules are inexpensive and readily available online, and the process is manageable for those comfortable with small electronics repair.
What You’ll Need:
- New Joy-Con joystick module(s) (ensure they are compatible with your specific Joy-Con model).
- Tri-wing screwdriver (Y00)
- Phillips head screwdriver (PH00)
- Plastic spudger or pry tools
- Tweezers (optional, but helpful)
The Replacement Process (Overview):
- Power off your Switch and detach the Joy-Con.
- Unscrew the four tri-wing screws on the back of the Joy-Con.
- Carefully pry open the casing using a plastic spudger. Be gentle, as there are ribbon cables connecting the two halves.
- Disconnect the battery and then remove it.
- Unscrew the Phillips head screws holding the mid-frame and the joystick module in place.
- Carefully disconnect the ribbon cable for the joystick and remove the old module.
- Insert the new joystick module, reconnect its ribbon cable, and reassemble everything in reverse order.
There are many excellent video tutorials available online that can guide you step-by-step through this process. Take your time and be meticulous.
Prevention is Key: Prolonging Joy-Con Life
Once you’ve fixed your drift, or if you’re looking to avoid it altogether, consider these preventative measures:
- Keep Them Clean: Regularly wipe down your Joy-Cons, especially around the base of the joysticks, to prevent dust and debris buildup.
- Gentle Use: Avoid excessive force or “smashing” the joysticks during intense gaming sessions.
- Storage: When not in use, store your Switch and Joy-Cons in a clean, dust-free environment, perhaps in a carrying case.
- Protective Covers: While not a direct drift prevention, joystick caps can protect the rubber and reduce some types of wear.
Conclusion
Joy-Con drift can be a frustrating problem, but it’s not always a death sentence for your controllers. By starting with simple software calibrations, moving to targeted cleaning with contact cleaner, and, if necessary, undertaking a joystick module replacement, you can often bring your Joy-Cons back to full functionality without the expense of buying new ones. Remember to proceed with caution for any hardware repairs and always consult online guides for visual assistance if you’re unsure.


