


Maximizing Nintendo Switch storage for digital games: SD card guide?
The Ever-Growing Digital Library: Why Your Switch Needs More Space
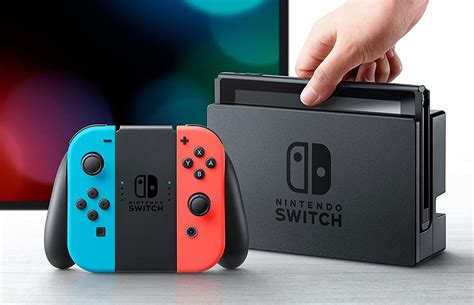
The Nintendo Switch has revolutionized portable gaming, offering a vast library of titles ranging from indie gems to blockbuster exclusives. While the console itself is a marvel, its internal storage capacity can quickly become a bottleneck, especially for avid digital game collectors. With titles frequently exceeding 5-10GB, and some even reaching over 20GB, the Switch’s built-in memory fills up fast, leading to frustrating choices about what to keep and what to delete. Fortunately, expanding your Switch’s storage is a straightforward and essential upgrade.
Understanding Nintendo Switch Storage: The Basics
The standard Nintendo Switch models come with 32GB of internal NAND memory, while the OLED model offers a more generous 64GB. However, a significant portion of this space is reserved for the operating system and essential software, leaving users with considerably less for actual games. For instance, a 32GB Switch might only offer around 25GB of usable space. Digital games, software updates, and downloadable content (DLC) all compete for this precious real estate, making an external solution almost mandatory for anyone with more than a handful of digital titles.
Choosing the Right microSD Card for Your Switch
The Nintendo Switch exclusively uses microSD cards for expandable storage. But not all microSD cards are created equal. Understanding the different types and specifications is crucial to making an informed purchase that ensures optimal performance.
Types of microSD Cards: microSDHC vs. microSDXC
- microSDHC (Secure Digital High Capacity): These cards range from 4GB to 32GB. While compatible with the Switch, their smaller capacities are quickly outgrown by modern game sizes.
- microSDXC (Secure Digital eXtended Capacity): These cards range from 64GB all the way up to 2TB. microSDXC cards are the recommended choice for the Nintendo Switch due to their significantly larger storage potential.
Capacity and Speed: What to Look For
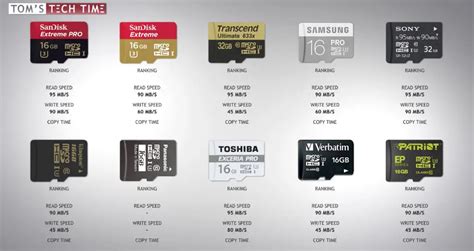
When selecting a microSD card, two primary factors matter: capacity and speed.
- Capacity: Consider your gaming habits. For casual players, 128GB or 256GB might suffice. However, for those who frequently download games or anticipate building a large digital library, 512GB or even 1TB cards are highly recommended. Remember, it’s better to have more space than you think you need.
- Speed: The Nintendo Switch supports UHS-I (Ultra High Speed Phase I) microSD cards. Look for cards with a read speed of at least 60-95 MB/s. While UHS-II cards exist and offer faster speeds, the Switch does not utilize their full potential, so investing in a more expensive UHS-II card provides no additional benefit for the console. Cards with a ‘U1’ or ‘U3’ rating indicate minimum write speeds, and an ‘A1’ or ‘A2’ rating signifies optimized performance for running applications, which can subtly improve game loading times.
Installing Your New microSD Card
Installing a microSD card into your Nintendo Switch is a simple process:
- Power Down: Completely turn off your Nintendo Switch. Do not just put it into sleep mode. Hold the Power button for a few seconds and select ‘Power Options’ then ‘Turn Off’.
- Locate the Slot: On the back of the Switch console, lift the kickstand. The microSD card slot is located underneath.
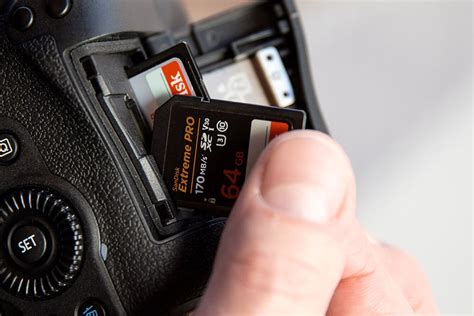
- Insert the Card: Carefully slide the microSD card into the slot with the label facing the same direction as the screen (or towards the top of the console). You should hear a faint click as it locks into place.
- Close the Kickstand: Push the kickstand back into its original position.
- Power On: Turn on your Nintendo Switch. The console will automatically detect the new storage.
Managing Your Nintendo Switch Data
Once your microSD card is installed, the Switch will automatically prioritize it for new game downloads if space is available. However, you might want to manage existing data.
Moving Existing Games
While the Nintendo Switch allows you to move downloaded software data (the game files themselves) between the console’s internal memory and the microSD card, it’s not a direct ‘move’ function as you might find on other systems. Instead, you’ll need to:
- Archive the Software: Go to ‘System Settings’ > ‘Data Management’ > ‘Manage Software’. Select the game you wish to move, then choose ‘Archive Software’. This deletes the game data from its current location but keeps its icon on your Home screen and saves data on the console.
- Re-download the Software: Select the archived game’s icon on your Home screen. The system will prompt you to re-download it. If your microSD card has sufficient space, the game will automatically be downloaded to the card.
Designating Download Locations
By default, if a microSD card is inserted, new downloads will go to the card. If the card fills up, the system will use internal memory. You cannot manually designate a default storage location; the system handles it automatically.
Tips for Optimal Performance and Longevity
- Buy from Reputable Brands: Stick to well-known manufacturers like SanDisk, Samsung, or Lexar to ensure reliability and quoted speeds.
- Avoid Removing While Powered On: Always power off your Switch completely before inserting or removing the microSD card to prevent data corruption.
- Backup Save Data: While game data resides on the microSD card, save data is typically stored on the console’s internal memory. Consider a Nintendo Switch Online subscription for cloud save backups.
- Don’t Fill to 100%: Leaving a small amount of free space (e.g., 5-10%) on your microSD card can help maintain optimal performance.
Conclusion: Expand Your Horizons, Expand Your Play
Expanding your Nintendo Switch’s storage with a high-quality microSD card is a game-changer for digital enthusiasts. It eliminates the constant struggle of managing limited space, allows you to keep more of your favorite titles readily available, and ensures a seamless gaming experience. By choosing the right card and understanding how to manage your data, you’ll unlock the full potential of your Nintendo Switch, allowing you to build an expansive digital library without compromise.


