


How to maximize Nintendo Switch storage with affordable SD cards for big games?
The Nintendo Switch, while a marvel of portable gaming, comes with a notorious limitation: its internal storage. With only 32GB (or 64GB for the OLED model), a significant portion of which is reserved for the system, downloading even a handful of modern, graphically intensive titles can quickly fill up your console. Games like The Legend of Zelda: Tears of the Kingdom, Pokémon Scarlet and Violet, or Doom Eternal can easily consume 10-18GB each, making additional storage not just a convenience, but a necessity for serious digital gamers.
The Perennial Storage Problem
As digital game libraries grow, so does the frustration of constantly deleting and redownloading titles just to make space for new adventures. This problem is exacerbated by the increasing size of game updates and downloadable content (DLC). Relying solely on physical game cartridges helps, but many popular titles are digital-only or offer substantial digital expansions. The good news is that expanding your Switch’s storage is incredibly simple and surprisingly affordable thanks to microSD cards.
Choosing the Right SD Card: Capacity & Speed
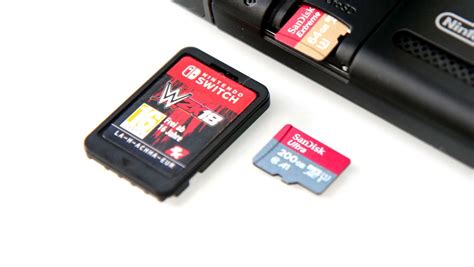
Not all microSD cards are created equal, but for the Nintendo Switch, the requirements are straightforward. The console supports microSD, microSDHC, and microSDXC cards up to 2TB. The key factors to consider are:
- Capacity: This is arguably the most important. While 32GB or 64GB cards are cheap, they offer only a slight improvement. For big games, aim for at least 128GB, with 256GB or 512GB being ideal for most users who download frequently. 1TB cards are also available and increasingly affordable for ultimate storage.
- Speed: The Switch benefits from UHS-I (Ultra High Speed Phase I) compatible cards. Look for a ‘U1’ or ‘U3’ rating and an ‘A1’ or ‘A2’ app performance class rating. These indicate faster read/write speeds, which translate to quicker game loading times and smoother performance. Most modern, reputable microSD cards meet these criteria, so you don’t need to break the bank for top-tier speeds.
Crucially, avoid no-name brands or suspiciously cheap cards from unknown sellers, as these often have fake capacities or poor reliability.
Recommended Capacities and Brands
For the best balance of cost and utility, consider these options:
- 128GB: A great starting point if you’re on a tight budget. It provides space for about 4-8 large games.
- 256GB: The sweet spot for many gamers, offering ample room for a substantial library without a significant price jump. You can usually store 8-15 large titles.
- 512GB: For power users or those who want to forget about storage issues for a long time. This capacity can hold 15-30+ large games comfortably.
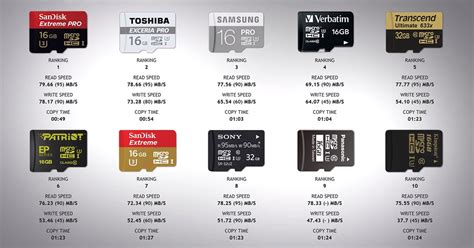
Reputable brands like SanDisk, Samsung, Lexar, and PNY consistently offer reliable and high-performance microSD cards at competitive prices. Keep an eye out for sales, especially around major shopping holidays.

Installation and Game Management
Installing an SD card in your Switch is incredibly simple:
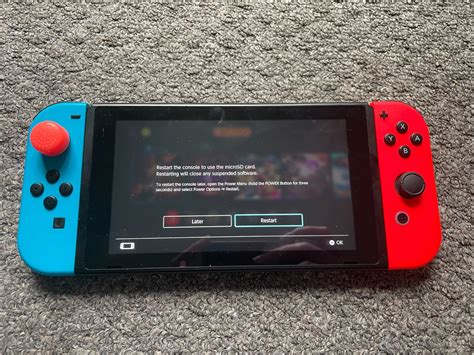
- Turn off your Nintendo Switch completely.
- Open the kickstand on the back of the console to reveal the microSD card slot.
- Insert the microSD card with the label facing the same direction as the screen until it clicks into place.
- Close the kickstand and power on your Switch.
Your Switch will automatically detect the new storage. Any new games you download will automatically save to the microSD card. To move existing games from internal memory to the SD card:
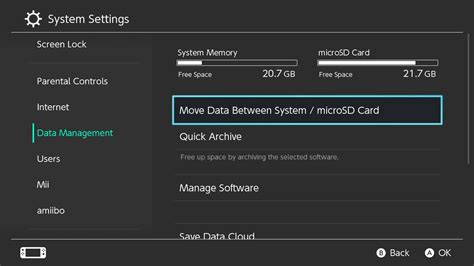
- Go to System Settings > Data Management > Manage Software.
- Select the game you wish to move and choose ‘Archive Software’ then ‘Download’ it again, which will now place it on the SD card. Note: You cannot directly ‘move’ game data between internal and SD storage; you must archive and redownload.
Maximizing Your Newfound Space
Even with an expanded SD card, good data management practices can help you get the most out of your storage:
- Archive Rarely Played Games: If you’ve finished a game and aren’t planning to play it soon, archive it. This deletes the game data but keeps the save data, allowing you to redownload it later without losing progress.
- Delete Unused Screenshots/Videos: Over time, captured media can accumulate. Regularly review and delete unnecessary screenshots and video clips.
- Prioritize Digital vs. Physical: If you buy physical game cartridges, the base game data is on the cart, saving space. However, updates and DLC still require storage, so consider where you need the most space.
Investing in a high-capacity, affordable microSD card is one of the best upgrades you can make for your Nintendo Switch. It eliminates storage anxiety, lets you enjoy your entire digital library without compromise, and ensures you’re always ready for the next big release. With numerous reliable options available at budget-friendly prices, there’s no reason to let limited storage hold back your gaming experience.


