


How to free up Switch console storage for more big and small games?

Is your Nintendo Switch constantly telling you it’s full? In today’s digital gaming landscape, games are bigger than ever, and the Switch’s internal 32GB (or 64GB for OLED models) storage can fill up surprisingly fast. Thankfully, you don’t have to delete your favorite titles permanently to make room for new adventures. Here’s a comprehensive guide to help you manage and free up your Switch console’s storage.
1. Archive or Delete Downloaded Software
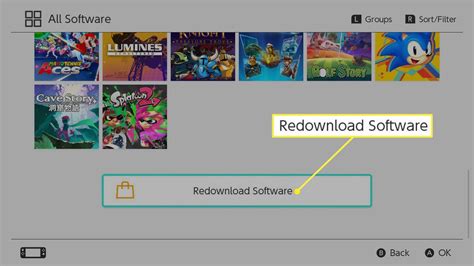
This is often the first and most effective step. The Switch offers two main options for removing downloaded games from your active storage: ‘Archive Software’ and ‘Delete Software’.
- Archive Software: This option removes the game data from your console but keeps its icon on your Home menu, allowing you to easily redownload it later if you own it digitally. Crucially, it does not delete your save data, which is stored separately. This is ideal for games you might want to play again in the future but aren’t actively playing now.
- Delete Software: This option completely removes the game data and its icon from your Home menu. Like archiving, it typically does not delete your save data. Use this for games you are absolutely certain you won’t play again, or if you need to perform a clean reinstall.
How to Archive or Delete:
- From the Home menu, highlight the game you wish to manage.
- Press the ‘+’ or ‘-‘ button to open the Options menu.
- Select ‘Manage Software’.
- Choose either ‘Archive Software’ or ‘Delete Software’.
2. Move Download Data to a MicroSD Card
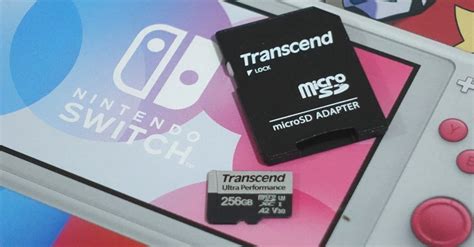
If you don’t already have a microSD card, it’s highly recommended. The Switch supports microSD, microSDHC, and microSDXC cards up to 2TB. Once inserted, the Switch will automatically use the microSD card for new downloads. For existing data:
While you can’t manually move individual games from internal storage to the microSD card (or vice-versa) directly, you can achieve this by deleting the game from internal storage and then redownloading it while the microSD card is inserted. The system will then automatically install it to the SD card.
To ensure future downloads go to the SD card:
- Go to ‘System Settings’ on the Home menu.
- Scroll down to ‘Data Management’.
- Under ‘Manage Software’, you can see where your games are stored. The system will prioritize the SD card if one is present.
3. Delete Screenshots and Video Captures
Every time you press the Capture button, you’re saving either an image or a 30-second video clip. These can accumulate quickly, especially if you record a lot of gameplay. While individual captures are small, hundreds or thousands of them can take up significant space.
How to manage captures:
- From the Home menu, select ‘Album’.
- You can browse through your captures here.
- To delete, select a capture (or multiple captures), press ‘A’ to open options, and choose ‘Delete’.
- Consider backing up important captures to a computer or social media before deleting them from your console.
4. Understand Save Data and Cloud Saves
It’s important to distinguish between game data (the actual game files) and save data (your progress in the game). Game save data is typically very small and is stored separately on the console’s internal memory. Archiving or deleting a game does not delete your save data. For Nintendo Switch Online subscribers, your save data is also backed up to the cloud, providing an extra layer of security and allowing you to retrieve your saves even if you delete the local data.
Therefore, deleting save data is generally not a significant way to free up space unless you have many games with exceptionally large save files, which is rare. You can manage save data under ‘System Settings’ > ‘Data Management’ > ‘Delete Save Data’. Be cautious, as deleting save data is permanent for local files.
5. Upgrade to a Larger MicroSD Card
If you’re an avid digital game buyer or frequently download large titles, you might eventually fill up even a moderately sized microSD card. When this happens, consider upgrading to a larger capacity card (e.g., 256GB, 512GB, or even 1TB). Ensure you purchase from reputable brands to avoid counterfeit cards.
How to upgrade your microSD card:
- Copy all data from your old microSD card to your computer (ensure your computer has enough space and a card reader).
- Insert the new, larger microSD card into your computer.
- Copy all the data from your computer to the new microSD card.
- Insert the new microSD card into your Nintendo Switch.
Your Switch should recognize all your games and data on the new card. Always power off your Switch before inserting or removing a microSD card.

Conclusion: Keep Gaming Without Limits
Managing your Nintendo Switch’s storage is an ongoing task, especially with new games and updates constantly arriving. By regularly archiving unused games, utilizing a high-capacity microSD card, and occasionally clearing out old screenshots and videos, you can ensure your console always has room for the next big (or small) adventure. Happy gaming!


