


How to fix Joy-Con drift: DIY tips & repair options for Switch?
What is Joy-Con Drift and Why Does It Happen?
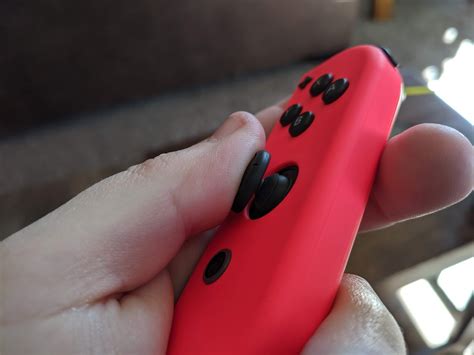
Joy-Con drift is a common, frustrating issue experienced by many Nintendo Switch owners. It occurs when your Joy-Con controller registers movement even when the analog stick is not being touched, leading to unwanted character movement, menu scrolling, or camera panning in games. This phenomenon is primarily caused by wear and tear on the analog stick’s internal components, such as the potentiometers, or by dust and debris accumulating under the stick mechanism, interfering with its sensors.
Simple DIY Fixes: Calibration and Cleaning
1. Calibrate Your Joy-Cons
Before attempting any physical repairs, the first and simplest step is to recalibrate your Joy-Cons. This can often resolve minor drift issues caused by software glitches or slight sensor misalignment.
- From the Switch HOME Menu, go to System Settings.
- Scroll down and select ‘Controllers and Sensors’.
- Choose ‘Calibrate Control Sticks’.
- Follow the on-screen prompts, pressing the control stick you want to calibrate.
- Test the stick by tilting it in various directions. If it detects input without being touched, proceed with calibration, recentering the stick and following instructions.
2. Clean Under the Stick
Dust, dirt, pet hair, or other tiny particles can get trapped under the Joy-Con’s analog stick, obstructing its sensors. A thorough cleaning can sometimes work wonders.
- Turn off your Switch.
- Detach the problematic Joy-Con.
- Gently lift the rubber skirt around the base of the analog stick.
- Use a can of compressed air (or a blower bulb) to blast air into the gaps around the stick, ensuring you get into all crevices. Hold the can upright to prevent propellant discharge.
- Alternatively, you can use isopropyl alcohol (90% or higher). Apply a small amount to a cotton swab or a clean cloth and carefully work it around the base of the stick, rotating the stick to allow the alcohol to seep in. Let it dry completely before reattaching to the Switch.

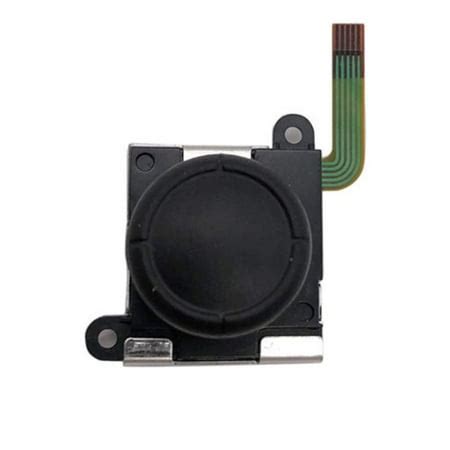
More Involved DIY Repairs: Replacing the Analog Stick Module
If calibration and cleaning don’t solve the problem, the internal components of the analog stick are likely worn out. This requires opening the Joy-Con and replacing the entire stick module. This is a more advanced DIY repair that requires specific tools and a steady hand.
What you’ll need:
- Y00 Tri-wing screwdriver
- Phillips #00 screwdriver
- Spudger or plastic opening tool
- Replacement analog stick module (ensure it’s compatible with your Joy-Con model)
- Tweezers (optional, but helpful for small ribbon cables)
Steps (simplified):
- Carefully remove the four tri-wing screws on the back of the Joy-Con.
- Gently pry open the Joy-Con shell, being extremely cautious of the ribbon cables connecting the two halves.
- Disconnect the battery and other relevant ribbon cables.
- Unscrew the Phillips head screws holding the analog stick in place.
- Carefully remove the old stick and replace it with the new module.
- Reconnect all cables, reassemble the Joy-Con, and test.
Warning: Opening your Joy-Cons voids your warranty and there’s a risk of damaging internal components if not done carefully. Watch detailed video tutorials specific to your Joy-Con model before attempting this repair.
Professional Repair Options
If DIY repairs seem too daunting or don’t work, consider professional services.
1. Nintendo’s Official Repair Service
Nintendo offers repair services for Joy-Con drift, and in many regions, they have offered free repairs even outside of warranty due to the widespread nature of the issue. Check Nintendo’s official support website for your region’s policy and instructions on how to submit a repair request. This is often the safest and most reliable option, ensuring genuine parts and expert handling.
2. Third-Party Repair Shops
Local electronics repair shops or specialized gaming console repair centers can also fix Joy-Con drift. These can be a quicker alternative to Nintendo’s service, especially if your warranty has expired or if you’re in a hurry. Always check reviews and inquire about their warranty for the repair.

Preventing Future Drift
While drift can be an inevitable outcome of extensive use, you can take steps to potentially prolong the life of your Joy-Cons:
- Handle with Care: Avoid excessive force or aggressive movements when using the analog sticks.
- Keep Clean: Regularly use compressed air to clear any debris around the stick base.
- Use Protective Covers: Silicone grips can help keep dust out, though their effectiveness varies.
- Store Properly: Keep your Switch and controllers in a clean, dust-free environment when not in use.

Conclusion
Joy-Con drift is a frustrating but often fixable problem. Whether you opt for a simple recalibration, a more hands-on DIY repair, or Nintendo’s official service, there are several avenues to get your Switch controllers back in perfect working order. Don’t let drift ruin your gaming experience – choose the repair option that best suits your comfort level and get back to enjoying your favorite Switch titles.


