


How to fix common Joy-Con drift on Switch? Get back to gaming big & small!

Few things disrupt a gaming session on the Nintendo Switch quite like Joy-Con drift. That infuriating sensation of your character moving on its own, or the camera constantly panning, can turn an immersive adventure into a frustrating ordeal. Fortunately, many common cases of Joy-Con drift can be resolved with a bit of troubleshooting, cleaning, or even a simple repair. Let’s dive into practical steps to get your controllers—and your gaming experience—back on track.
Understanding Joy-Con Drift: The Foe of Flawless Gaming
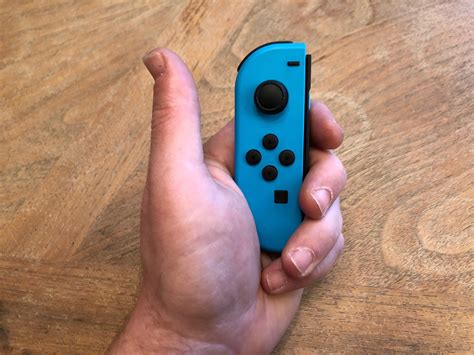
Joy-Con drift occurs when the console registers input from the joystick even when it’s not being touched. This phantom movement is typically caused by wear and tear on the analog stick’s internal components, dust or debris accumulating under the stick, or, less commonly, a manufacturing defect. Over time, the conductive pads inside the joystick module can degrade, leading to inconsistent electrical signals.
The symptoms are unmistakable: unintended character movement, camera rotation, menu selection, or even an inability to register certain inputs accurately. Identifying the problem is the first step towards a solution.

Initial Software Solutions: Start Simple
Before you crack open your Joy-Cons or reach for cleaning supplies, it’s wise to rule out any software-related glitches. These simple steps can often resolve minor issues.
Update Your System Software
Ensure your Nintendo Switch is running the latest system software. Updates often include bug fixes that might address controller communication issues. Go to System Settings > System > System Update.
Calibrate Your Joysticks
Calibration can sometimes reset the joystick’s ‘neutral’ position. Navigate to System Settings > Controllers and Sensors > Calibrate Control Sticks. Follow the on-screen prompts carefully. If the drift persists after calibration, it’s likely a hardware issue.
Disconnect and Reconnect Joy-Cons
For wireless Joy-Cons, try disconnecting and then re-pairing them. Go to System Settings > Controllers and Sensors > Disconnect Controllers, then press the SYNC button on each Joy-Con to re-pair them.
Non-Invasive Cleaning Methods: The First Line of Hardware Defense
If software fixes don’t work, dust and debris are often the culprits. These methods are non-invasive and can be highly effective.
Use Compressed Air
Gently blast compressed air around the base of the analog stick. Hold the can upright and use short bursts. While doing so, wiggle the stick in all directions to help dislodge any trapped particles.
Isopropyl Alcohol Application
This is a widely recommended method. Get a cotton swab or a soft cloth slightly dampened with 90%+ isopropyl alcohol. Gently lift the rubber skirt at the base of the problematic analog stick and carefully apply a small amount of alcohol underneath. Wiggle the stick around to help the alcohol seep in and clean the internal contacts. Let it dry completely for at least 15-30 minutes before testing. Repeat if necessary.

The DIY Hardware Fix: Replacing the Joystick Module
If cleaning and calibration fail, the internal joystick module is likely worn out. This is a more advanced fix that requires opening the Joy-Con, but replacement modules are inexpensive and readily available.
What You’ll Need
- A small Philips head screwdriver (PH00 or PH000)
- A Tri-wing (Y00 or Y000) screwdriver (essential for Nintendo screws)
- Plastic spudgers or prying tools
- Replacement joystick module(s)
- Optional: Tweezers, small container for screws
The Process (Simplified)
There are many excellent video tutorials online that provide step-by-step guidance. In essence, you’ll remove the back casing of the Joy-Con, carefully disconnect the battery and other ribbon cables, unscrew and remove the faulty joystick module, and install the new one. This process requires patience and a steady hand. Be very careful with the tiny ribbon cables, as they are fragile.
When to Call in the Experts or Replace
If DIY repairs aren’t your forte or you’re uncomfortable opening your Joy-Cons, there are other options.
Nintendo’s Official Repair Service
Nintendo offers repair services for Joy-Con drift, and in some regions, they even do so for free, regardless of warranty status, due to the widespread nature of the issue. Check Nintendo’s official support website for information specific to your region.
Purchase New Joy-Cons or Alternative Controllers
If all else fails, or you simply want a hassle-free solution, buying a new pair of Joy-Cons or investing in a Pro Controller (which is generally more robust and less prone to drift) might be your best bet. There are also many third-party controllers designed for the Switch that offer varying levels of quality and features.
Preventative Measures: Keeping Drift at Bay
While drift can be an inevitable consequence of heavy use, you can take steps to prolong the life of your Joy-Cons:
- Handle with Care: Avoid excessive force or aggressive stick flicking.
- Keep it Clean: Regularly wipe down your controllers to prevent dust buildup.
- Storage: Store your Switch and Joy-Cons in a clean, dust-free environment, perhaps in a carrying case when not in use.
Get Back to the Game!
Joy-Con drift is a common and frustrating problem, but it’s often a fixable one. By systematically going through software checks, non-invasive cleaning, or even a DIY module replacement, you can often restore your controllers to their original functionality. Don’t let drift ruin your gaming experience; use these tips to get back to enjoying your Nintendo Switch to its fullest!


