


How to effectively fix Nintendo Switch Joy-Con drift?
Nintendo Switch Joy-Con drift is a frustratingly common issue where the analog sticks register movement even when they aren’t being touched, leading to unintended character movement or menu selections. This pervasive problem can significantly disrupt your gaming experience, but fortunately, there are several effective methods to tackle it, ranging from simple software adjustments to more involved hardware repairs.
Understanding the Root Cause of Joy-Con Drift
Joy-Con drift typically stems from wear and tear on the analog stick’s internal components, specifically the potentiometers. Over time, dust, debris, or even microscopic particles can accumulate inside the stick mechanism, interfering with the electrical contacts and causing erroneous input signals. While sometimes a software glitch, it’s more often a hardware fault.

Initial Troubleshooting: Software and Calibration
Before diving into any physical repairs, it’s crucial to exhaust all software-based solutions. These methods are quick, risk-free, and surprisingly effective for minor drift issues.
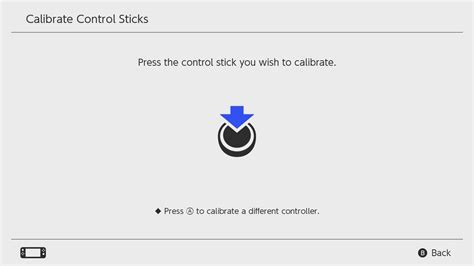
1. Calibrate Your Joy-Cons
Nintendo Switch allows you to recalibrate your analog sticks. Navigate to System Settings > Controllers and Sensors > Calibrate Control Sticks. Follow the on-screen prompts carefully. If one stick is drifting, focus on recalibrating that specific stick. Sometimes, a simple reset of the stick’s central position can resolve the problem.
2. Update System Firmware and Controller Firmware
Ensure your Nintendo Switch console is running the latest system update. Go to System Settings > System > System Update. Also, update your Joy-Con firmware by going to System Settings > Controllers and Sensors > Update Controllers. Outdated firmware can sometimes lead to unexpected controller behavior.
Cleaning Solutions for Accumulated Debris
If software fixes don’t work, the next step involves cleaning the analog stick. Often, dust or grime beneath the rubber skirt of the stick is the culprit.
1. Use Compressed Air
Gently lift the rubber skirt at the base of the analog stick and spray short bursts of compressed air into the opening. Be careful not to spray too close or for too long, as this can introduce moisture. Rotate the stick and repeat the process around its base to dislodge any trapped particles.
2. Apply Electrical Contact Cleaner or Isopropyl Alcohol
For more stubborn debris, a small amount of electrical contact cleaner (specifically designed for electronics) or 90%+ isopropyl alcohol can be effective. Apply a tiny amount (e.g., with a cotton swab or a precise nozzle) under the rubber skirt while holding the Joy-Con upside down to prevent liquid from seeping into other components. Move the stick vigorously in all directions after application to help work the cleaner in and break down grime. Allow it to dry completely before testing.
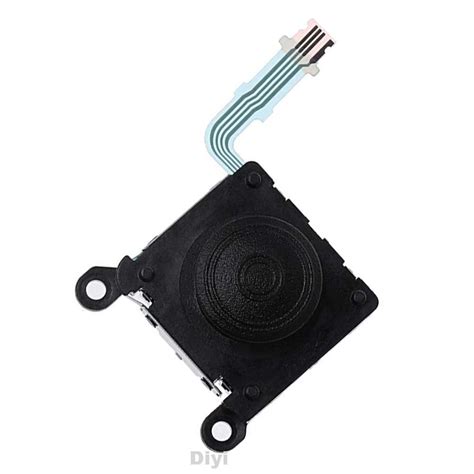
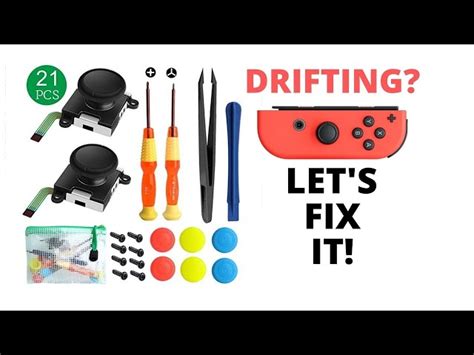
Advanced Fix: Replacing the Analog Stick Module
When cleaning and calibration fail, the most reliable long-term solution is to replace the faulty analog stick module. This requires opening the Joy-Con, which can void your warranty, so proceed with caution.
Tools You’ll Need:
- Y00 Tri-wing screwdriver (for Nintendo’s proprietary screws)
- Phillips #00 screwdriver
- Plastic spudger or pry tool
- Tweezers
- Replacement analog stick module (ensure it’s compatible with your Joy-Con model)
![List of 30 Workshop Tools & Their Uses [Names & PDF]](/images/aHR0cHM6Ly90czEubW0uYmluZy5uZXQvdGg/aWQ9T0lQLkZ6YjI4eWZjNENqbkpRdnZncWxHSmdIYUVLJnBpZD0xNS4x.webp)
Brief Overview of the Process:
- Carefully remove the four Y00 screws from the back of the Joy-Con.
- Gently separate the back casing, being mindful of the ribbon cables connecting the battery.
- Disconnect the battery and remove it.
- Unscrew the Phillips screws holding the mid-frame and the stick module in place.
- Carefully disconnect the ribbon cable for the analog stick module.
- Remove the old module and install the new one.
- Reverse the steps to reassemble the Joy-Con.
- Finally, recalibrate the newly installed stick in your Switch settings.
Official Nintendo Repair Service
If you’re uncomfortable with DIY repairs or if your Joy-Cons are still under warranty, contacting Nintendo’s official customer support for repair is always an option. In many regions, Nintendo offers free Joy-Con drift repairs, even for out-of-warranty controllers, due to the widespread nature of the issue. Check Nintendo’s official support website for details specific to your region.
Preventative Measures to Reduce Future Drift
While drift can be an inherent design flaw, some practices can help prolong the life of your Joy-Cons:
- Avoid excessive force when playing.
- Keep your Joy-Cons clean and free of dust and debris.
- Store them in a protective case when not in use.
Conclusion
Joy-Con drift, though frustrating, doesn’t have to spell the end for your Nintendo Switch controllers. By systematically trying software calibrations, cleaning techniques, or ultimately replacing the faulty module, you can effectively bring your Joy-Cons back to full working order. Remember to assess your comfort level with repairs and utilize official Nintendo services if needed.


