


Guide to choosing the right microSD card for Switch game storage needs?

Why Your Nintendo Switch Needs a MicroSD Card
While the Nintendo Switch comes with some internal storage (32GB for the original and Lite, 64GB for the OLED model), a significant portion of this is reserved for the system itself. With game sizes constantly increasing, especially for digital downloads, updates, and DLC, this internal space fills up remarkably fast. A microSD card is virtually essential for any Switch owner looking to store more than a handful of games, ensuring you don’t have to constantly delete and re-download titles.
Choosing the right microSD card isn’t just about capacity; speed and compatibility are equally crucial for a seamless gaming experience. A slow card can lead to longer load times and even performance issues in some games. This guide will walk you through the key specifications and considerations to make an informed decision.
Understanding MicroSD Card Specifications
When shopping for a microSD card, you’ll encounter several terms and symbols. Here’s a breakdown of what matters most for your Switch:
1. Capacity: How Much Space Do You Need?
- 64GB-128GB: A good starting point for casual gamers who primarily buy physical cartridges but want space for a few digital titles, updates, and DLC.
- 256GB-512GB: Recommended for most digital-first gamers. This range offers a sweet spot between cost and ample storage for a sizable library of games.
- 1TB-2TB: For hardcore digital collectors or those who never want to worry about storage. While expensive, these cards offer massive space for hundreds of games. The Switch officially supports up to 2TB, though 1TB is currently the largest commercially available.
Consider your gaming habits: Do you buy mostly digital or physical? How many games do you typically keep installed at once? It’s often better to slightly overestimate your needs to future-proof your purchase.
2. Speed: Why It Matters for Gaming
The speed of a microSD card directly impacts game load times and how quickly data can be written or read. For the Nintendo Switch, you need a card that supports the UHS-I interface.
- UHS Speed Class (U1 vs. U3):
- U1 (UHS Speed Class 1): Guarantees a minimum sequential write speed of 10 MB/s. This is the minimum recommended for the Switch.
- U3 (UHS Speed Class 3): Guarantees a minimum sequential write speed of 30 MB/s. While the Switch doesn’t fully utilize this higher write speed for game installation as it’s often limited by its own read speeds, U3 cards often have better overall performance and read speeds, making them a good choice.
- Application Performance Class (A1 vs. A2):
- A1 (Application Performance Class 1): Designed to optimize storage for running apps and supports random read IOPS of 1,500 and random write IOPS of 500. This is excellent for the Switch.
- A2 (Application Performance Class 2): Offers even better random performance (4,000 IOPS random read, 2,000 IOPS random write). While technically superior, the Nintendo Switch may not fully leverage the benefits of A2 over A1, but it certainly won’t hurt performance.
Recommendation: Look for a card that is at least UHS-I (U1) and ideally A1 or A2 rated. Cards labeled with U3 and A2 will typically offer the best performance, though U1/A1 is perfectly adequate.

Recommended Brands and Where to Buy
Stick to reputable brands to avoid counterfeit cards and ensure reliability. Well-known manufacturers include:
- SanDisk (often recommended by Nintendo itself)
- Samsung
- Kingston
- PNY
- Lexar
Purchase from trusted retailers (e.g., Amazon directly, Best Buy, Walmart, Target) rather than third-party sellers on marketplaces, as fake microSD cards are unfortunately common. A deal that seems too good to be true usually is.
Installation and Formatting Your MicroSD Card
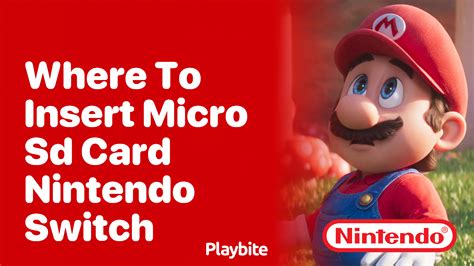
Installing a microSD card in your Switch is straightforward:
- Turn off your Nintendo Switch completely (hold down the power button and select ‘Power Options’ > ‘Turn Off’).
- Open the kickstand on the back of the console to reveal the microSD card slot.
- Insert the microSD card with the label facing the same direction as the screen until it clicks into place.
- Close the kickstand and power on your Switch.
The Switch will automatically detect and format the card if needed. If you’ve used the card before, it might prompt you to format it for Switch use, which will erase all existing data.
Tips for Optimal MicroSD Card Usage
- Don’t constantly swap cards: While the Switch supports hot-swapping (inserting/removing while on), it’s always safer to power down completely before removing or inserting a card to prevent data corruption.
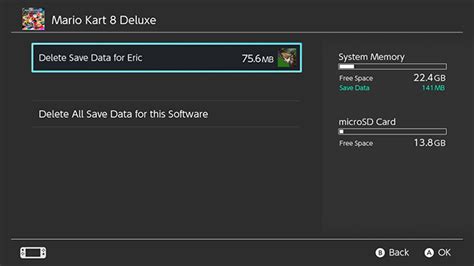
- Regularly check free space: Go to System Settings > Data Management to see how much space you have left and manage your installed games.
- Consider a larger card upfront: It’s generally more cost-effective and convenient to buy a single, larger card than to upgrade multiple times.
Conclusion
Investing in the right microSD card is one of the best upgrades you can make for your Nintendo Switch experience. By focusing on a reputable brand, sufficient capacity (256GB-512GB for most), and appropriate speed ratings (UHS-I U1/A1 or better), you’ll ensure your console has plenty of room for all your adventures and loads them without a hitch. Happy gaming!


