


Fixing Joy-Con drift: best DIY methods for Nintendo Switch?
Few things are as frustrating for a Nintendo Switch owner as experiencing Joy-Con drift. That maddening sensation of your character moving without input, or the camera constantly panning, can turn an enjoyable gaming session into a test of patience. While Nintendo offers official repair services, many players prefer to tackle the issue themselves. This guide explores the best DIY methods for fixing Joy-Con drift, ranging from simple software tweaks to more involved hardware replacements.
Understanding Joy-Con Drift and Its Causes
Joy-Con drift occurs when the console registers input from the analog stick even when it’s not being touched. This phantom movement is primarily caused by wear and tear on the joystick mechanism. Over time, friction between the stick’s components and the internal contact pads can lead to debris accumulation or physical degradation of the sensors. Dust, dirt, and microscopic plastic shavings can interfere with the electrical contacts, leading to inconsistent readings. Less commonly, manufacturing defects can also contribute to the problem.
Initial Software Fixes: Calibration and Updates
Before diving into any physical repairs, it’s crucial to rule out software-related issues. These steps are simple and risk-free:
- Calibrate Your Joy-Cons: Go to System Settings > Controllers and Sensors > Calibrate Control Sticks. Follow the on-screen prompts to test and recalibrate each stick. Sometimes, a slight misalignment can be corrected this way.
- Update Firmware: Ensure both your Nintendo Switch console and Joy-Con controllers have the latest firmware. Go to System Settings > System > System Update to check for console updates, and System Settings > Controllers and Sensors > Update Controllers to update your Joy-Cons.
DIY Cleaning Methods for Mild Drift
If software calibration doesn’t work, the next step involves cleaning. This is often effective for drift caused by dust and debris.
Method 1: Compressed Air
This is the least invasive physical method. Lift the rubber skirt around the base of the analog stick and spray compressed air into the gap. Aim to dislodge any dust or particles that might be interfering with the sensors. Be gentle and use short bursts.
Method 2: Electrical Contact Cleaner
For more stubborn drift, electrical contact cleaner can be highly effective. Purchase a contact cleaner specifically designed for electronics (look for non-residue, plastic-safe options). With the Joy-Con disconnected from the console:
- Lift the rubber skirt around the base of the analog stick.
- Apply a tiny amount of contact cleaner into the gap, rotating the stick as you spray to ensure even distribution.
- Wiggle the stick vigorously in all directions for a minute or two to work the cleaner in and dislodge debris.
- Allow the Joy-Con to dry completely (at least 15-30 minutes) before retesting.

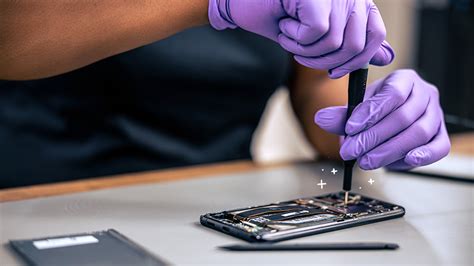
The Hardware Fix: Replacing the Joystick Module
If cleaning fails, the drift is likely due to significant wear on the joystick module itself, requiring a replacement. This is a more advanced DIY repair but is generally achievable with the right tools and patience.
Tools You’ll Need:
- Tri-wing screwdriver (specific to Nintendo hardware)
- Small Philips head screwdriver
- Spudger or plastic opening tools
- Replacement joystick module (ensure it’s compatible with your Joy-Con model)
- Tweezers (optional, for delicate ribbon cables)
General Steps (varies slightly by Joy-Con type):
- Disassemble the Joy-Con: Carefully remove the four tri-wing screws on the back of the Joy-Con. Pry open the casing using a spudger. Be extremely gentle as internal ribbon cables connect the two halves.
- Disconnect Battery: Locate and carefully disconnect the battery.
- Remove Mid-Frame Screws: Remove the Philips head screws holding the battery compartment and the inner frame in place.
- Disconnect Ribbon Cables: Carefully unlatch and disconnect any ribbon cables covering or attached to the joystick module.
- Remove Old Joystick: Unscrew the two Philips head screws holding the joystick module in place and gently lift it out.
- Install New Joystick: Place the new joystick module, screw it in, and reconnect all ribbon cables.
- Reassemble: Follow the disassembly steps in reverse, ensuring all connections are secure before closing the casing.
- Calibrate: Once reassembled, calibrate the new joystick in your Switch settings.

Numerous video tutorials are available online that provide detailed, step-by-step instructions for specific Joy-Con models, which are highly recommended to follow during the repair.
Preventative Measures and Alternatives
To reduce the likelihood of future drift:
- Protective Cases: While not foolproof, cases can help keep dust and debris out.
- Careful Handling: Avoid being overly aggressive with the analog sticks.
- Hall Effect Joysticks: Consider upgrading to third-party Hall effect joysticks. These use magnets instead of physical contacts, making them immune to traditional wear-and-tear drift. This requires a similar replacement process but offers a more permanent solution.
Important Warnings Before You Start
- Voiding Warranty: Opening your Joy-Cons will likely void any remaining warranty with Nintendo.
- Risk of Damage: DIY repairs carry a risk of further damaging your Joy-Cons or other internal components if not performed carefully.
- Nintendo’s Official Service: If you’re uncomfortable with DIY repairs, or if your Joy-Cons are still under warranty, consider Nintendo’s official repair service. In some regions, they even offer free out-of-warranty repairs for drift.
Conclusion
Joy-Con drift is a common ailment for Nintendo Switch owners, but it doesn’t have to be a death sentence for your controllers. From simple calibration and cleaning with compressed air or contact cleaner to the more involved process of replacing the joystick module, there are effective DIY methods to bring your Joy-Cons back to life. Always start with the least invasive options and proceed cautiously. With the right approach, you can restore precision to your gameplay and get back to enjoying your favorite Switch titles drift-free.


