


Fix Joy-Con drift on Nintendo Switch without buying new controllers?

Joy-Con drift is a notoriously frustrating issue that plagues many Nintendo Switch owners, causing characters to move or cameras to pan without any input. The instinctive reaction for many is to consider buying new Joy-Cons, but that can be an expensive solution. Fortunately, there are several methods you can try to mitigate or even eliminate drift without spending money on brand-new controllers.
Understanding Joy-Con Drift
Before diving into fixes, it’s helpful to understand what causes drift. Most often, it’s due to dust, dirt, or other debris accumulating beneath the joystick’s skirt, interfering with the electrical contacts. Over time, wear and tear on the internal components can also contribute to the problem, leading to inaccurate readings from the joystick potentiometers.
Official Nintendo Troubleshooting Steps
Nintendo itself offers a few basic troubleshooting steps that should always be your first port of call. These are software-based and don’t require opening your controllers.
- Update Firmware: Ensure your Nintendo Switch console and Joy-Cons are running the latest system firmware. Go to System Settings > System > System Update.
- Calibrate Control Sticks: This is crucial. In System Settings, navigate to Controllers and Sensors > Calibrate Control Sticks. Follow the on-screen instructions to check and recalibrate your problematic Joy-Con. If the dot doesn’t stay in the center, or moves on its own, your Joy-Con has drift.
DIY Cleaning Solutions
Many users have found success by physically cleaning their Joy-Cons. This targets the most common cause: debris.
Compressed Air Method
Using a can of compressed air is often the simplest and least invasive first step. Power off your Switch. Gently lift the rubber skirt at the base of the problematic joystick and blast short bursts of compressed air underneath. Rotate the joystick while doing this to ensure you cover all angles. This can dislodge dust and grit.

Isopropyl Alcohol Method
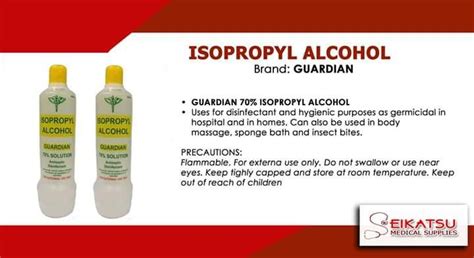
If compressed air doesn’t work, isopropyl alcohol (90% or higher) can be effective. Again, power off your Switch. Apply a small amount of isopropyl alcohol to a cotton swab. Gently lift the rubber skirt of the joystick and carefully wipe around the base, allowing a tiny amount of alcohol to seep underneath. Wiggle the joystick around to help spread it. Let it dry completely for at least 15-30 minutes before testing. Isopropyl alcohol evaporates quickly and leaves no residue, making it safe for electronics when used sparingly.
Advanced Hardware Fixes (Use with Caution)
For persistent drift, some more involved hardware solutions exist, though they carry a higher risk and may void your warranty if not done by Nintendo.
The “Paper Shim” Trick
This somewhat unconventional fix involves placing a tiny piece of paper or thin cardboard (around 1mm thick) underneath the metal plate inside the Joy-Con, specifically beneath the joystick module. The idea is to apply a tiny bit of upward pressure, ensuring better contact for the sensor. This requires opening the Joy-Con, which can be delicate.

Replacing the Joystick Module
While this involves buying a part, it’s significantly cheaper than a new Joy-Con pair. Replacement joystick modules are readily available online, often with included tools. This is a more advanced DIY repair, requiring precision and comfort with small electronics. If done correctly, it can completely resolve severe drift caused by internal wear and tear.

When to Consider Professional Repair or Replacement
If you’ve tried all the DIY methods and your Joy-Con still drifts, it might be time to consider sending it to Nintendo for repair (which may be free, depending on your region and warranty status, as Nintendo has acknowledged the issue) or, as a last resort, purchasing new controllers. However, by trying these steps first, you stand a good chance of extending the life of your existing Joy-Cons.


