


DIY fix for Joy-Con drift on Nintendo Switch?

Tackling the Infamous Joy-Con Drift on Your Nintendo Switch
Joy-Con drift is a frustrating reality for many Nintendo Switch owners. This common issue causes characters or cursors to move on screen without any input from the player, severely impacting gameplay. While Nintendo offers official repair services, many users wonder if a do-it-yourself fix is feasible. The good news is, depending on the severity and cause, several DIY approaches can potentially resolve or alleviate the problem.
Understanding Joy-Con Drift
At its core, Joy-Con drift occurs when the console registers input from a control stick even when it’s not being touched. This is usually due to wear and tear on the internal components of the analog stick module, particularly the potentiometers, which can accumulate dust, debris, or suffer from degraded conductive pathways. Before diving into physical repairs, always start with the simplest solutions.
Step 1: Software Solutions and Calibration
Sometimes, the issue isn’t hardware-related but a software glitch or a need for calibration. These steps are quick, easy, and carry no risk of damaging your hardware:
- Update Your System and Controllers: Ensure your Nintendo Switch system software and Joy-Con firmware are up to date. Go to System Settings > System > System Update. For controllers, go to Controllers and Sensors > Update Controllers.
- Calibrate Control Sticks: This is a crucial step. Navigate to System Settings > Controllers and Sensors > Calibrate Control Sticks. Follow the on-screen instructions for both Joy-Cons. If you see movement when the stick is centered, the calibration might help.
- Recalibrate Motion Controls: While less directly related to stick drift, it’s good practice to recalibrate motion controls under Controllers and Sensors > Calibrate Motion Controls.

Step 2: Basic Cleaning Without Disassembly
If software solutions don’t work, dust and debris under the stick’s skirt are often the culprits. This method attempts to clear that without opening the Joy-Con:
- Compressed Air: Use a can of compressed air to blow around the base of the analog stick. Hold the can upright and use short bursts. Wiggle the stick around while doing so.
- Rubbing Alcohol (IPA): With the Joy-Con powered off, gently lift the rubber skirt at the base of the stick and apply a tiny drop of 99% Isopropyl Alcohol (IPA) using a cotton swab or a very fine dropper. Wiggle the stick vigorously in all directions to work the alcohol into the mechanism. Let it dry completely for at least 15-30 minutes before turning the Joy-Con back on. IPA evaporates quickly and leaves no residue.

Step 3: Using Electrical Contact Cleaner
This method is similar to using IPA but utilizes a specialized electrical contact cleaner spray (like WD-40 Specialist Electrical Contact Cleaner). These cleaners are designed to remove oil, dirt, flux, and condensation from sensitive electronics without leaving residue.
How to Apply: Carefully lift the rubber skirt at the base of the stick module. With the Joy-Con powered off, spray a very small amount of the contact cleaner into the gap. Wiggle the stick around vigorously for a minute or two to distribute the cleaner. Allow it to dry thoroughly before testing. This can sometimes restore connectivity to worn contacts.
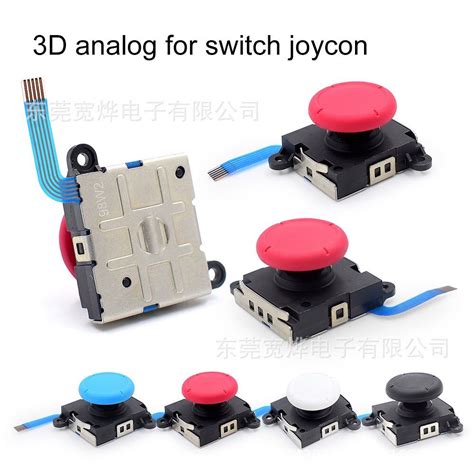
Step 4: The Hardware Fix – Replacing the Thumbstick Module
If all else fails, the most effective DIY fix is often to replace the entire analog stick module. This requires opening the Joy-Con and a certain level of technical comfort. Replacement modules are readily available online.
Tools You’ll Need:
- Y00 Tri-wing screwdriver (essential for Nintendo consoles)
- Phillips #00 screwdriver
- Plastic spudger or opening picks
- Tweezers (helpful for small cables)
- Replacement analog stick module
Brief Overview of Steps (Consult a detailed video guide!):
- Remove the four Y00 screws from the back of the Joy-Con.
- Carefully pry open the two halves, being mindful of the ribbon cables connecting them.
- Disconnect the battery and other relevant ribbon cables.
- Unscrew the Phillips screws holding the faulty stick module in place.
- Remove the old module and install the new one.
- Carefully reassemble the Joy-Con, ensuring all cables are properly connected.
- Test the new stick using the calibration menu.
Warning: This process voids your warranty and carries a risk of damaging internal components if not performed carefully. Watch several video tutorials before attempting this.
Important Considerations Before You Begin
- Warranty: Attempting any physical DIY fix will likely void any remaining warranty on your Joy-Cons.
- Risk of Damage: There’s always a risk of damaging internal components, especially delicate ribbon cables, when opening electronic devices.
- Official Repairs: Nintendo often offers free repairs for Joy-Con drift, even out of warranty, depending on your region and consumer laws. It’s worth checking their support website before attempting a DIY fix.
Conclusion
While Joy-Con drift can be incredibly annoying, you have several DIY options ranging from simple software tweaks to more involved hardware replacements. Always start with the least invasive methods and proceed cautiously. If you’re not comfortable with delicate electronics, sending your Joy-Cons to Nintendo for professional repair might be the best and safest course of action.


