Best Switch console storage upgrade for expanding your game library?

Why Your Nintendo Switch Needs a Storage Upgrade
The Nintendo Switch, in all its iterations (Standard, Lite, and OLED), comes with a relatively modest amount of internal storage. The original and Lite models offer 32GB, while the OLED boasts 64GB. While this might seem sufficient for a few games, modern digital titles, patches, and DLC can quickly consume this space. With the eShop constantly releasing new and exciting games, many Switch owners find themselves constantly deleting and redownloading titles just to make room for new adventures. This constant management is not only frustrating but also prevents you from enjoying your full game library on demand.
The Essential Solution: MicroSD Cards
Fortunately, Nintendo designed the Switch with expandability in mind. The primary and most effective way to upgrade your console’s storage is by utilizing a microSD card. These tiny, powerful storage devices slot into a dedicated port on your Switch, instantly multiplying your available space and allowing you to download dozens, if not hundreds, of games without worry.
What to Look For in a Switch MicroSD Card
Not all microSD cards are created equal. To ensure optimal performance and avoid potential issues like slow loading times or game crashes, there are a few key specifications to consider:
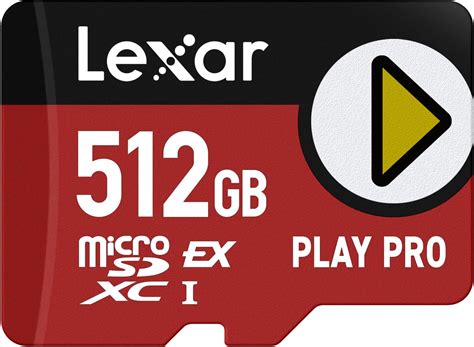
- Capacity: This is arguably the most important factor. While 128GB is a good starting point, many recommend 256GB or 512GB for serious digital collectors. With larger capacities up to 1TB or even 2TB now available, you can truly future-proof your storage.
- Speed Class: The Switch benefits most from UHS-I (Ultra High Speed Phase I) compatible cards. Look for cards with a U1 or U3 speed class rating, indicated by a number inside a ‘U’ symbol. U3 cards offer faster minimum sequential write speeds (30MB/s) compared to U1 (10MB/s), which can translate to quicker game loading and installation times.
- Application Performance Class: An A1 or A2 rating signifies that the card is optimized for running applications, which is essentially what games are. An A2 rating is generally better for performance, but an A1 card will still work perfectly fine with the Switch.
- Brand Reputation: Stick with reputable brands like SanDisk, Samsung, Lexar, or Kingston. Counterfeit or low-quality cards can lead to data corruption and performance issues.
Recommended MicroSD Card Capacities for Switch Users
The “best” capacity depends heavily on your gaming habits. Here’s a general guide:
- 128GB: Suitable for light digital gamers who mostly buy physical cartridges but want space for a few eShop exclusives and DLC.
- 256GB: A popular sweet spot for many, offering ample space for a significant digital library without breaking the bank.
- 512GB: Ideal for avid digital collectors and those who frequently download large AAA titles. This capacity provides substantial room to grow.
- 1TB or More: For the ultimate digital library, ensuring you rarely have to think about deleting games. While more expensive, the peace of mind is invaluable.

Installing Your New MicroSD Card
Upgrading your Switch storage is a straightforward process:
- Power Off Your Switch: Completely shut down your console, do not just put it to sleep.
- Open the Kickstand: On the back of the Switch (under the kickstand), you’ll find the microSD card slot.
- Insert the Card: Gently push your new microSD card into the slot until it clicks into place.
- Power On and Format: Turn your Switch back on. The console will detect the new card and prompt you to format it. Follow the on-screen instructions. This step is crucial as it prepares the card for use with the Switch’s file system.
- Transfer Data (Optional): If you’re upgrading from an existing microSD card, you’ll need to transfer your data. The easiest way is to copy all contents from the old card to a PC, then paste them onto the new, formatted card.

Tips for Managing Your Expanded Game Library
With a vast amount of storage, you can now manage your games more effectively:
- Download Freely: No more agonizing over which game to delete. Download demos, new releases, and rediscover old favorites without storage anxiety.
- Archive Software: If you do run low (unlikely with a large card), remember that archiving software only deletes the game data but keeps the save data. You can redownload the game later.
- Prioritize Digital: For competitive or frequently played games, consider getting them digitally to always have them ready on your console.
Conclusion: Seamless Gaming with Ample Storage
Upgrading your Nintendo Switch console’s storage with a high-quality microSD card is not just a convenience; it’s a necessity for any serious gamer. By investing in a reputable card with sufficient capacity and appropriate speed, you unlock the full potential of your Switch, ensuring you always have room for new adventures and uninterrupted access to your entire game library. Say goodbye to storage woes and hello to endless gaming possibilities!