


Best Nintendo Switch SD card? Maximize game storage for digital titles.

Why Your Nintendo Switch Needs an SD Card
The Nintendo Switch is a fantastic portable console, but its internal storage leaves much to be desired. With only 32GB (or 64GB for the OLED model) of built-in space, a significant portion of which is reserved for the system, it’s easy to run out of room quickly. This is especially true for players who prefer to buy digital titles from the eShop, as modern games can range from a few gigabytes to over 20GB each. An SD card is not just an accessory; it’s an essential upgrade for any serious Switch owner looking to maximize their game library and enjoy uninterrupted gaming.
Expanding your storage with a high-quality microSD card means you won’t have to constantly delete and re-download games, saving you time and hassle. It also ensures you have enough space for game updates, DLC, and screenshots without compromise.

Key Factors When Choosing an SD Card for Your Switch
Not all microSD cards are created equal. To get the best experience on your Nintendo Switch, consider these crucial factors:
1. Capacity
- 128GB-256GB: A good starting point for casual players or those who mix physical and digital games.
- 512GB: An excellent balance of cost and capacity for most digital-heavy users.
- 1TB: The ultimate choice for collectors with extensive digital libraries, future-proofing your storage for years to come. The Switch officially supports up to 2TB, though 1TB is currently the largest widely available and cost-effective option.
2. Speed Ratings
While the Switch itself has limitations on read/write speeds, choosing a fast card will ensure optimal performance. Look for these specifications:
- UHS-I: The Switch supports UHS-I speed class cards. UHS-II cards are faster but offer no benefit to the Switch and are more expensive.
- U3 or V30: These ratings indicate a minimum write speed of 30MB/s, which is ideal for smooth game downloads and loading times.
- A1 or A2: These ‘Application Performance Class’ ratings are more critical for smartphones, but an A1 or A2 card ensures good random read/write performance, which can slightly benefit game loading.
Ultimately, a card with UHS-I, U3, and ideally A1 or A2 ratings will provide the best balance of speed and compatibility for your Switch.
Recommended SD Cards for Nintendo Switch
While Nintendo offers officially branded microSD cards, these are often just rebadged versions of popular cards with a higher price tag. You can get excellent performance and value from standard, reputable brands.
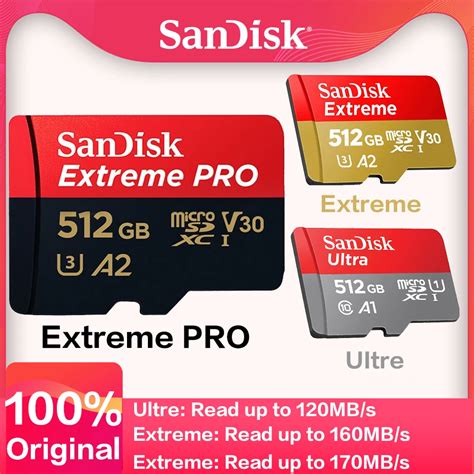
1. SanDisk microSDXC for Nintendo Switch
These are the official Nintendo-licensed cards, often featuring iconic artwork (like a Mario star or a Hylian Crest). They are reliable, meet all the necessary speed requirements, and are guaranteed to work flawlessly. While pricier than their non-licensed counterparts, they offer peace of mind.
2. SanDisk Extreme / Ultra Series
SanDisk’s non-licensed Extreme and Ultra series are fantastic alternatives. They offer excellent read/write speeds (UHS-I, U3, A1/A2), come in various capacities up to 1TB, and are often more affordable than the branded versions. The Extreme line offers slightly better performance but both are perfectly suitable.
3. Samsung EVO Select / EVO Plus
Samsung’s EVO Select (often found on Amazon) and EVO Plus series are highly regarded for their reliability and performance. They meet the U3 and A2 standards, providing robust speeds for the Switch. They are also known for competitive pricing, making them a great value option.
4. Lexar PLAY microSDXC / PNY PRO Elite
Other reputable brands like Lexar and PNY also offer excellent microSD cards that meet the Switch’s requirements. The Lexar PLAY is specifically designed for gaming and media, while PNY’s PRO Elite series delivers consistent, fast performance. Both are solid choices if you find them at a good price.
How to Install and Manage Your SD Card
Installing a microSD card in your Nintendo Switch is incredibly simple:
- Power Down: Turn off your Switch completely (not just sleep mode).
- Locate Slot: The microSD card slot is usually found under the kickstand on the back of the console.
- Insert Card: Gently push the microSD card into the slot until it clicks into place.
- Power On: Turn your Switch back on.
The Switch will automatically detect and format the card if needed. You can check your storage status by going to System Settings > Data Management. New digital game downloads will automatically go to the SD card, assuming there’s enough space. You can also manually move data between the system memory and the microSD card from the Data Management menu, though this is primarily for saved game data (which generally cannot be moved) and screenshots/videos.

Conclusion
Investing in a good microSD card is arguably the most important accessory for any Nintendo Switch owner, especially those who embrace digital gaming. By understanding the key factors of capacity and speed, you can confidently choose a reliable and high-performing card that will significantly enhance your gaming experience. Whether you opt for an official Nintendo-branded card or a trusted alternative from SanDisk, Samsung, or Lexar, you’ll be well-equipped to download, play, and store all your favorite titles without ever worrying about running out of space.
Don’t let limited storage hold you back from expanding your Switch library. Pick up a high-capacity, fast microSD card today and truly maximize your digital gaming adventures!


