


How to upgrade Switch storage for more digital games?
Why Expand Your Nintendo Switch Storage?
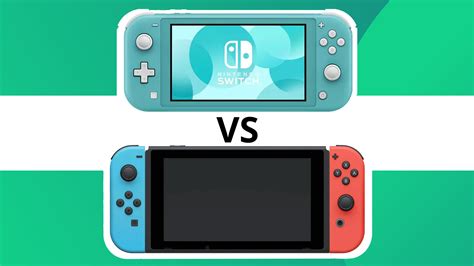
The Nintendo Switch, while a fantastic console for gaming on the go or at home, comes with a rather modest internal storage capacity. The original Switch and Switch Lite offer 32GB, while the OLED model bumps it up slightly to 64GB. While this might seem sufficient for a few games, modern digital titles can easily consume several gigabytes each. Soon, you’ll find yourself constantly deleting games to make room for new ones, which can be a frustrating cycle. Fortunately, upgrading your Switch’s storage is straightforward and relatively inexpensive, allowing you to download and keep a vast library of digital games without compromise.
Understanding Switch Storage: The Power of microSD Cards
Unlike some other consoles that use proprietary hard drives or complex internal upgrades, the Nintendo Switch relies on standard microSD cards for expandable storage. This means you can easily purchase a high-capacity card, slot it in, and instantly multiply your available space. The Switch supports microSD, microSDHC, and microSDXC cards, with capacities ranging from a few gigabytes all the way up to 2 terabytes (TB), though cards above 1TB are currently rare and expensive.
Choosing the Right microSD Card for Your Switch
Not all microSD cards are created equal. While any compatible card will technically work, selecting the right one can significantly impact game loading times and overall performance. Here’s what to look for:
- Capacity: For most users, a 128GB, 256GB, or 512GB card offers a good balance of cost and space. If you’re a heavy digital game buyer, consider a 1TB card for maximum future-proofing.
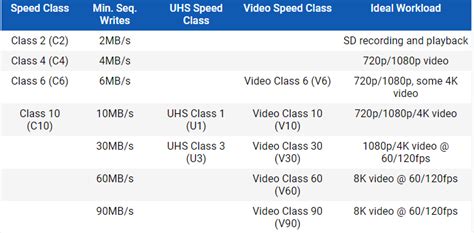
- Speed Class: This is crucial. Look for cards with a high read speed. Nintendo recommends using a UHS-I (Ultra High Speed Phase I) compatible card with a read speed of 60-95 MB/s. Cards rated ‘UHS Speed Class 3’ (U3) are ideal, but ‘UHS Speed Class 1’ (U1) also performs well. Avoid slower cards as they can lead to noticeable loading delays.
- Application Performance Class (A1/A2): While not strictly necessary for the Switch, cards with an A1 or A2 rating are optimized for faster application loading and random read/write operations, which can slightly improve game performance.
Stick to reputable brands like SanDisk, Samsung, or Lexar to ensure reliability and performance.
How to Install Your New microSD Card
Installing a microSD card into your Nintendo Switch is incredibly simple:
- Power Off Your Switch: It’s recommended to completely power down your console, not just put it to sleep. Hold the POWER Button for a few seconds, then select “Power Options” > “Turn Off.”
- Locate the microSD Card Slot: On the back of the original Switch and OLED model, lift the kickstand to reveal the slot. On the Switch Lite, the slot is located on the bottom edge, covered by a small flap.
- Insert the Card: Gently push the microSD card into the slot with the label facing upwards (or towards the console’s screen) until it clicks into place.
- Power On Your Switch: Your Switch will automatically detect the new storage. You may need to format it if it’s not already formatted to a compatible file system (FAT32 or exFAT).
That’s it! Your Switch now has significantly more storage for new digital game downloads.
Managing Your Game Data After the Upgrade
Once your new microSD card is installed, any new digital games you download will automatically save to it, provided there’s sufficient space. For games already on your internal storage, you have a couple of options:
- Archive and Redownload: To move a game from internal storage to the microSD card, you’ll need to archive it (which deletes the game data but keeps the save data) and then redownload it. When redownloaded, the game will install to your new microSD card by default.
- Manually Transfer (Limited): The Switch operating system doesn’t offer a direct ‘move to SD card’ option for installed games. Archiving and redownloading is the primary method to transfer. Save data, however, always remains on the console’s internal memory (or synced to the cloud with a Nintendo Switch Online subscription).
Conclusion: Enjoying Your Expanded Digital Library
Upgrading your Nintendo Switch’s storage with a high-quality microSD card is one of the best investments you can make for your gaming experience. It eliminates the hassle of constantly managing limited space, allowing you to download and enjoy a vast array of digital games without worry. With a simple installation process and a wide range of affordable options, there’s no reason to let storage limitations hold back your Switch gaming adventures.


