


How to fix Switch Joy-Con drift without replacing them?

Understanding Joy-Con Drift and Its Causes
Joy-Con drift is a frustrating issue where your Nintendo Switch controller registers movement even when you’re not touching the analog stick. This phantom input can severely impact gameplay, causing characters to move on their own or camera angles to shift erratically. While it’s a widespread problem often linked to wear and tear, dust, or debris accumulating under the joystick mechanism, there are several troubleshooting steps you can take before considering a costly replacement.
Start with Software: Calibration and Updates
Before diving into any physical remedies, always begin by checking your console’s software and calibrating your Joy-Cons. Sometimes, drift can be a software glitch rather than a hardware fault.
1. Update Your Nintendo Switch Console
Ensure your Switch is running the latest system software. Updates often include bug fixes that might resolve connectivity or input issues.
- From the HOME Menu, select ‘System Settings’.
- Scroll down to ‘System’ and select ‘System Update’.
2. Calibrate Control Sticks
Nintendo provides a built-in calibration tool that can sometimes correct minor drift issues.
- From the HOME Menu, select ‘System Settings’.
- Scroll down to ‘Controllers and Sensors’.
- Select ‘Calibrate Control Sticks’.
- Follow the on-screen instructions for each problematic Joy-Con stick.
3. Check for Input Device Interference
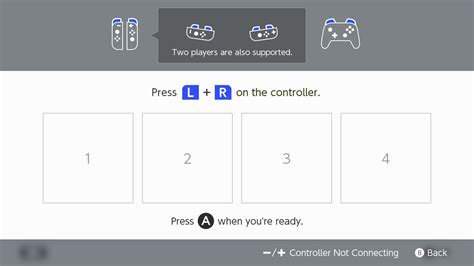
Ensure no other controllers or devices are inadvertently connected or causing interference. Disconnect and reconnect your Joy-Cons if necessary.

Hardware Solutions: Cleaning Without Disassembly
If software adjustments don’t solve the problem, the drift is likely caused by physical debris or dust under the analog stick’s housing. The good news is you can often clean this out without needing to open up your Joy-Cons.
1. Use Compressed Air
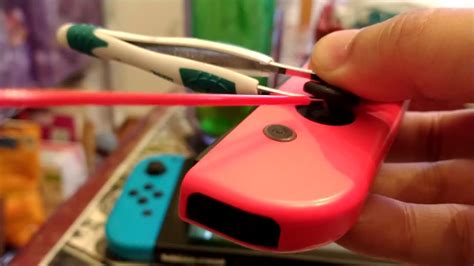
Compressed air can dislodge dust and small particles trapped beneath the stick’s skirt (the rubber flap around the base of the stick).
- Hold the Joy-Con so the stick is pointing downwards.
- Gently lift the rubber skirt around the base of the problematic analog stick.
- Using short bursts, spray compressed air into the gap, moving the stick around to expose all sides. Avoid tilting the can, which can release propellant.

2. Apply Electrical Contact Cleaner
For more stubborn debris or oxidation, a specialized electrical contact cleaner can be highly effective. These cleaners evaporate quickly and leave no residue.
- Ensure the Switch is turned off and the Joy-Con is detached.
- Gently lift the rubber skirt at the base of the analog stick.
- Spray a tiny amount of electrical contact cleaner (like WD-40 Specialist Contact Cleaner, not regular WD-40) into the exposed gap.
- Wiggle the stick in all directions for about 30 seconds to distribute the cleaner and work out any debris.
- Allow it to dry completely (a few minutes) before reattaching and testing. Repeat if necessary, but sparingly.
Prevention and Best Practices
To prolong the life of your Joy-Cons and minimize the chances of future drift:
- Store Carefully: Avoid leaving Joy-Cons where dust or pet hair can easily accumulate.
- Gentle Use: While gaming can be intense, try to be mindful of how much force you apply to the sticks.
- Keep Clean: Periodically wipe down your controllers with a dry, lint-free cloth.
When to Consider Professional Help or Component Replacement
If, after trying all the above methods, your Joy-Con drift persists, the internal joystick module might be permanently damaged. While this article focuses on *not replacing the Joy-Cons*, replacing just the internal joystick module is a more involved DIY repair that *does* require opening the controller and is usually cheaper than buying a whole new Joy-Con set. However, it requires specific tools and a steady hand. If you’re not comfortable with this, consider sending your Joy-Cons to Nintendo for repair (they’ve often offered free repairs for drift, even out of warranty) or seeking assistance from a local electronics repair shop.
By following these steps, you stand a good chance of resolving Joy-Con drift without having to purchase entirely new controllers, saving you money and extending the life of your existing hardware.


