


Best microSD for Switch: Maximize digital game storage?
Why Your Nintendo Switch Needs a MicroSD Card
The Nintendo Switch, an incredible hybrid console, offers unparalleled gaming flexibility. However, its Achilles’ heel for many dedicated players is its relatively modest internal storage. The original Switch and Switch Lite come with just 32GB, while the OLED model boasts a slightly improved 64GB. With modern games like The Legend of Zelda: Tears of the Kingdom easily consuming over 16GB, and many other titles taking up significant chunks, this space fills up rapidly, especially if you prefer digital downloads.
A microSD card is not just an upgrade; it’s an essential expansion for any serious Switch owner. It vastly increases the amount of digital games, DLC, and screenshots you can store, saving you the hassle of constantly archiving or deleting games to make space for new ones. Investing in a high-quality microSD card means more games, less waiting, and an uninterrupted gaming experience.

Key Factors When Choosing a MicroSD Card for Switch
Not all microSD cards are created equal, and choosing the right one for your Switch involves considering a few critical specifications to ensure optimal performance and value.
- Capacity: This is arguably the most important factor. While a 128GB card might suffice for a casual player, serious digital collectors should aim for 256GB, 512GB, or even 1TB. Consider your gaming habits: do you buy many digital titles, or mostly physical cartridges? A 256GB card can hold roughly 10-20 modern AAA Switch games, while a 512GB card offers double that.
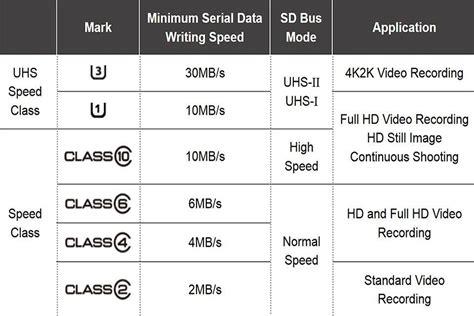
- Speed Ratings (UHS-I, U1, U3, V30): The Switch supports UHS-I microSD cards, with a maximum theoretical transfer speed of 104 MB/s. Look for cards rated U1 (minimum 10 MB/s sequential write speed) or, ideally, U3 or V30 (minimum 30 MB/s sequential write speed). While the Switch’s internal reader won’t fully utilize the highest speeds of U3/V30 cards in all scenarios, these ratings indicate a higher quality chip that generally performs better and more consistently.
- A1 vs. A2 Application Performance Class: While A1 and A2 ratings are primarily for Android devices to indicate faster random read/write speeds for running apps, the Switch doesn’t specifically leverage these for game loading in the same way. Focus more on the U-speed rating for overall game performance, but an A1 or A2 rating is a good indicator of a high-quality, fast card.
Recommended MicroSD Cards for Nintendo Switch
To help you make the best choice, here are some top recommendations that balance performance, reliability, and value for your Nintendo Switch.
- SanDisk MicroSDXC Card for Nintendo Switch: This is the official licensed card and often the most recommended. Available in various capacities (64GB to 1TB), these cards are specifically branded for the Switch, ensuring compatibility and reliable performance. They typically boast U3 and A1 ratings, making them excellent for game loading.
- SanDisk Extreme / Extreme Pro MicroSDXC: While not officially licensed, SanDisk’s Extreme series offers incredible speeds and durability. These cards often feature U3 and V30 ratings, providing top-tier read and write speeds that translate to smooth game loading and system performance. They are a great choice if you want maximum speed and reliability, and are often available at competitive prices.

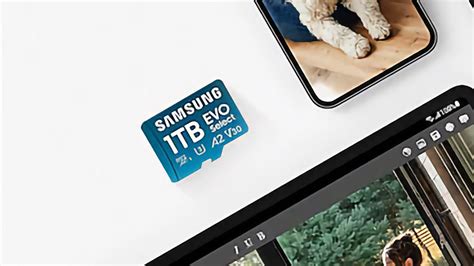
- Samsung EVO Select / EVO Plus MicroSDXC: Samsung’s EVO line is another highly regarded option, known for its strong performance, reliability, and excellent value. The EVO Select (often Amazon exclusive) and EVO Plus cards offer U3 and A2 ratings, delivering fast read/write speeds suitable for the Switch. They are a popular choice for their consistent quality and competitive pricing across various capacities.
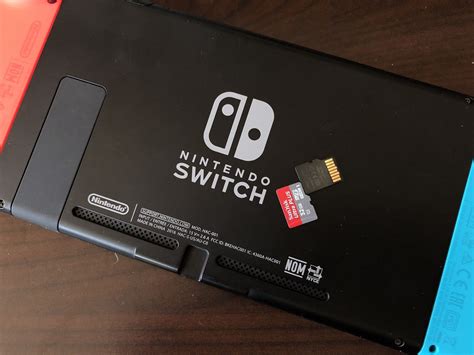
Installing and Managing Your Switch MicroSD Card
Installing a microSD card into your Nintendo Switch is straightforward:
- Power off your Switch completely (not just sleep mode).
- Open the kickstand on the back of the console to reveal the microSD card slot.
- Insert the card with the label facing the same direction as the screen until it clicks into place.
- Close the kickstand and power on your Switch. The console will automatically detect the new card and prompt you to format it if necessary.
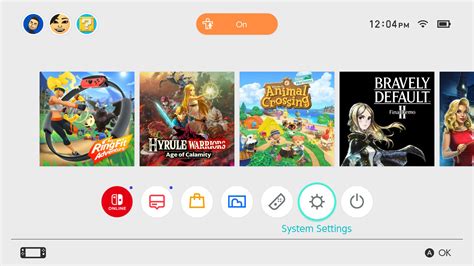
Once installed, new digital games will automatically download to the microSD card. You can check your storage usage and even move existing games between internal memory and the microSD card via the System Settings menu (Data Management > Manage Software).
Conclusion
Expanding your Nintendo Switch’s storage with a high-quality microSD card is one of the best upgrades you can make. It frees you from storage anxiety, allowing you to download more games, keep more screenshots, and fully immerse yourself in the vast world of Switch gaming. By choosing a reputable brand and considering the recommended speed classes, you’ll ensure a smooth, enjoyable experience for years to come.


