


How to free Switch storage for more games, big & small?
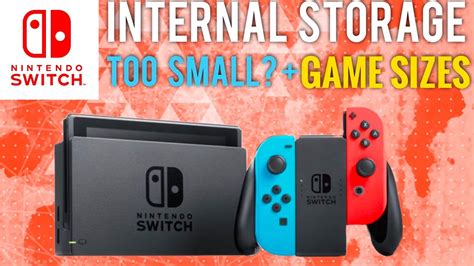
The Nintendo Switch, with its ever-growing library of incredible games, often presents a familiar challenge for many players: running out of storage space. Whether you’re eyeing a massive new RPG or several charming indie titles, a full system can put a damper on your gaming plans. Fortunately, there are several effective strategies to reclaim that precious gigabyte, ensuring you always have room for the next adventure.

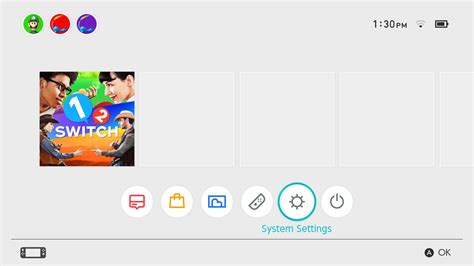
Check Your Current Storage Situation
Before you start deleting indiscriminately, it’s wise to understand what’s actually hogging your storage. The Switch provides a clear overview:
- From the HOME Menu, select System Settings.
- Scroll down to ‘Data Management’.
- Here you’ll see a breakdown of your Console Memory and, if inserted, your microSD Card, showing how much space is taken by software, save data, and screenshots/videos.
This overview helps you identify the biggest culprits and prioritize your cleaning efforts.
Archive vs. Delete: Knowing the Difference
When it comes to digital games, the Switch offers two key options, and understanding them is crucial:
- Archive Software: This option deletes the game’s core data from your Switch, freeing up significant space, but keeps the icon on your HOME Menu. Crucially, it preserves your save data! You can redownload the game at any time from the eShop or your user page. This is ideal for games you might want to play again in the future but don’t need immediately.
- Delete Software: This completely removes the game data and its icon from your Switch. While it also preserves your save data, it requires you to manually find and redownload the game from the eShop if you wish to play it again. It’s best used for demos or games you’re certain you’ll never touch again.
Managing Downloaded Software
This is usually where you’ll find the most significant space savings. Digital games, especially larger ones, can consume gigabytes of storage. To manage them:
- Go to System Settings > Data Management > Manage Software.
- Here, you’ll see a list of all your downloaded titles, sorted by size.
- Select a game and choose ‘Archive Software’ or ‘Delete Software’ based on your needs. Always prioritize archiving to retain save data and easy redownload access.
Consider archiving games you’ve completed, haven’t played in a long time, or smaller titles that you can easily redownload if needed.
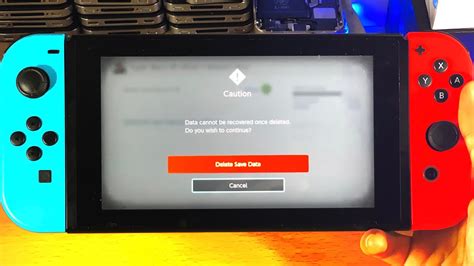
Clearing Out Save Data (Use with Caution!)
Game save data is typically quite small, often just a few megabytes. However, if you’re truly desperate for space and absolutely certain you will never play a particular game again, you can delete its save data.
Warning: Once save data is deleted, it is gone forever and cannot be recovered unless you have a Nintendo Switch Online subscription with cloud saves enabled for that specific game. Even then, deleting local save data will overwrite cloud data if you’re not careful.
To delete save data:
- Go to System Settings > Data Management > Delete Save Data.
- Select the game for which you want to delete data.
- Confirm your choice.
Wipe Those Screenshots and Videos
If you’re an avid in-game photographer or video clipper, these files can accumulate quickly. While individual screenshots are small, hundreds of them or multiple 30-second video clips can add up. They’re also usually easy to offload.
To manage them:
- From the HOME Menu, open the Album.
- Highlight the image or video you wish to delete.
- Press ‘A’, then ‘Delete’.
- For bulk deletion, open the Album, press ‘Y’ to go to ‘Filters’, then ‘Y’ again for ‘Selection Mode’. You can then select multiple items to delete.
Alternatively, you can transfer these files to a computer or smartphone if you wish to preserve them.

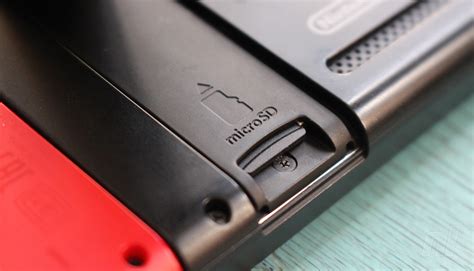
The Ultimate Solution: A microSD Card
While the above tips help manage your Switch’s internal 32GB (or 64GB on OLED models) storage, the most robust and long-term solution is to invest in a microSD card. The Switch supports microSD, microSDHC, and microSDXC cards up to 2TB.
- Benefits: Significantly expands your storage capacity, allowing you to download many more digital games without worrying about running out of space. Games will automatically install to the microSD card once inserted.
- Recommendation: Look for a reputable brand (SanDisk, Samsung, etc.) with a high read speed (UHS-I compatible, 60-90 MB/s recommended) for optimal performance.
- Transferring data: You can move data between your Switch’s internal memory and the microSD card via System Settings > Data Management > Move Data Between System / microSD Card.
Conclusion
Running out of space on your Nintendo Switch doesn’t have to be a permanent roadblock. By regularly checking your storage, intelligently archiving games you’re not actively playing, and taking advantage of microSD cards, you can keep your console ready for new adventures. A little data management goes a long way in ensuring your Switch gaming experience is always seamless and enjoyable, no matter how many big or small games you want to dive into.


