


Effective Switch storage solutions for a growing digital game library?

The Nintendo Switch has revolutionized portable gaming, offering a vast and ever-growing library of incredible titles. However, with its relatively modest 32GB (or 64GB for the OLED model) of internal storage, many players quickly find themselves running out of space, especially as their digital game collection expands. Large game sizes, constant updates, and DLC can quickly consume available memory, leading to frustrating decisions about what to keep and what to delete. Fortunately, there are effective solutions to ensure your digital library can grow without limits.
The Challenge of a Growing Digital Library
Nintendo Switch games, particularly those from major publishers, can range from a few gigabytes to over 20GB. When you consider multiple AAA titles, indie gems, and regular software updates, the internal storage fills up surprisingly fast. This issue is compounded for players who prefer purchasing digital versions for convenience, as these titles are stored entirely on the console or its expansion memory. Understanding these limitations is the first step toward effective storage management.
The Primary Solution: MicroSD Cards
The good news is that the Nintendo Switch supports MicroSD cards, offering a straightforward and robust solution for storage expansion. These tiny cards are your console’s best friend, allowing you to dramatically increase your game library’s capacity. When choosing a MicroSD card, consider the following:
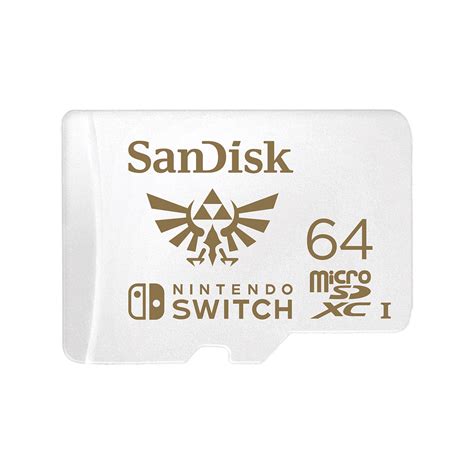
- Capacity: Cards range from 64GB to a whopping 1TB or even more. For a growing digital library, a 256GB, 512GB, or even 1TB card is highly recommended to future-proof your storage.
- Speed Class: Look for cards with a UHS-I (Ultra High Speed, Class 1) rating and an A1 or A2 application performance class. While the Switch doesn’t fully utilize the fastest speeds, these ratings indicate good read/write speeds, which can impact game load times. A higher A-rating (A2 > A1) generally means better performance for apps and games.
- Brand Reputation: Stick to reputable brands like SanDisk, Samsung, or Lexar to ensure reliability and performance.
Once you have your MicroSD card, simply insert it into the slot under the kickstand on your Switch, and the console will automatically recognize it. All new digital game downloads will default to the MicroSD card, and you can even transfer existing games from internal storage to the card.
Managing Your Digital Games Effectively
Even with a large MicroSD card, smart management practices can extend its lifespan and keep your library organized. The Switch offers useful features to help:
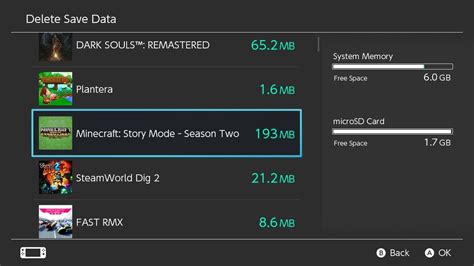
- Archiving vs. Deleting: When you need space, the Switch gives you two options: ‘Archive Software’ or ‘Delete Software’. Archiving removes the game data but keeps the icon and save data on your console, allowing for quick re-downloading later. Deleting removes everything. Always choose archive if you plan to play the game again in the future.
- Checking Storage Usage: Regularly navigate to System Settings > Data Management to see how much space your games and save data are consuming. This helps identify large games that might be good candidates for archiving if you’re not actively playing them.
- Prioritizing Installations: If you’re downloading multiple games, the Switch allows you to prioritize which ones download first.

Physical vs. Digital: Storage Implications
While this article focuses on digital libraries, it’s worth noting the storage impact of physical games. Physical game cartridges (Game Cards) use very little internal or MicroSD card storage for the core game. However, updates, patches, and downloadable content (DLC) for physical games will still be stored on your console’s internal memory or MicroSD card. If you frequently buy physical games, you’ll still need sufficient space for these additional files.

Best Practices for Switch Storage Optimization
- Go Big from the Start: Invest in the largest MicroSD card you can reasonably afford (512GB or 1TB) to minimize the need for future upgrades.
- Consolidate: If you have multiple smaller MicroSD cards, consider upgrading to one large card. Swapping cards frequently can be cumbersome and risks losing data.
- Clean Up Screenshots and Videos: The Switch allows you to capture screenshots and video clips. These can take up significant space over time. Periodically review and delete unwanted captures, or transfer them to a computer.
- Regularly Review Your Library: Take a moment every few months to look through your game library. Archive games you’ve completed and aren’t likely to replay soon.
Conclusion
A growing digital game library on your Nintendo Switch doesn’t have to be a source of frustration. By understanding the console’s storage limitations and leveraging the power of high-capacity, fast MicroSD cards, you can ensure that you always have space for new adventures. Couple this hardware solution with smart data management practices like archiving, and you’ll enjoy a seamless gaming experience without ever having to make tough choices about which games to keep.


