


How to free up Nintendo Switch storage for more digital games?

Understanding Nintendo Switch Storage Limitations
The Nintendo Switch is an incredibly versatile console, but its internal storage capacity—32GB for the original and Lite models, and 64GB for the OLED model—can fill up surprisingly quickly. For players who frequently purchase digital games from the eShop, or those who download large game updates and DLC, encountering the dreaded “not enough space” message is a common frustration. With game sizes constantly increasing, proactive storage management becomes essential to ensure you always have room for your next gaming adventure.
Checking Your Current Storage Status
Before you start deleting items, it’s wise to assess where your storage is actually being used. This gives you a clear picture of what’s consuming the most space and helps you make informed decisions.
To check your storage:
- From the HOME Menu, select System Settings (the gear icon).
- Scroll down the left-hand menu and select Data Management.
- Here, you’ll see a breakdown of your System Memory (internal storage) and any inserted microSD Card, along with how much space is occupied by software, save data, and screenshots/videos.
Archiving or Deleting Downloaded Software
This is often the quickest and most effective way to free up significant space, especially if you have several large digital games installed.
- Archiving Software: This option deletes the game’s data from your console but keeps its icon on your HOME Menu and, importantly, preserves your save data. You can re-download the game at any time from the eShop if you own it digitally or insert the game cartridge. This is ideal if you plan to play the game again in the future.
- Deleting Software: This removes both the game data and its icon from the HOME Menu. Like archiving, it typically preserves your save data. You can still re-download it from the eShop.
To Archive or Delete:
- From the HOME Menu, highlight the game you want to manage.
- Press the + or – button on your controller.
- Scroll down and select Manage Software.
- Choose either Archive Software or Delete Software.
Alternatively, you can manage software via System Settings > Data Management > Manage Software, which allows you to see all installed titles and their sizes.
![How To Delete Games On Nintendo Switch [The right way!] - Alvaro Trigo ...](/images/aHR0cHM6Ly90czIubW0uYmluZy5uZXQvdGg/aWQ9T0lQLlZYVEMxaFVId3NkcngzWTl5ZENDaVFIYUU4JnBpZD0xNS4x.webp)
Managing Game Save Data
It’s crucial to understand that game save data is stored separately from the game itself and usually takes up very little space (typically a few megabytes per game). When you archive or delete a game, its save data remains on your system memory.
- Deleting Save Data: Only delete save data if you are absolutely certain you will never play that game again or do not care about your progress. Once deleted, it’s usually gone forever unless you have a cloud backup. To delete save data, go to System Settings > Data Management > Delete Save Data, then select the game whose save data you wish to remove.
- Nintendo Switch Online Cloud Backups: If you have a Nintendo Switch Online subscription, many (but not all) games automatically back up your save data to the cloud. This provides a safety net if you ever need to delete save data from your console or transfer it to another system.
Deleting Screenshots and Video Captures
Screenshots and especially video clips (up to 30 seconds of gameplay) can accumulate quickly and take up noticeable space, particularly if you’re an avid content creator or simply capture many memorable moments.
To delete them:
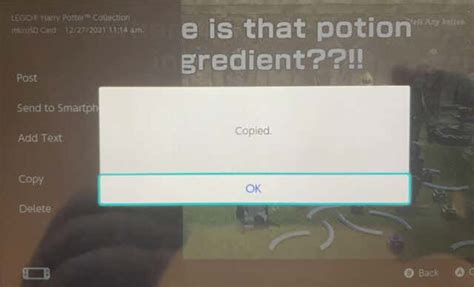
- From the HOME Menu, open the Album icon.
- You can select individual images/videos to delete, or use the Filtering/Sorting option to select multiple items more efficiently.
- Once selected, choose Delete at the bottom of the screen.
Consider backing up important captures to a computer or social media before permanently deleting them from your console.
Clearing Cache Data
While not a huge space saver, clearing your cache can sometimes free up a small amount of space and resolve minor system issues. This primarily affects the internet browser cache and temporary data from downloaded content.
To clear cache:
- Go to System Settings > System.
- Scroll down and select Formatting Options.
- Select Clear Cache.
- Choose the user for whom you want to clear the cache and confirm.
Note: This process will not delete save data or downloaded software, only temporary system files.
Expanding Storage with a microSD Card
This is, without a doubt, the most effective and recommended long-term solution for storage woes. Nintendo Switch consoles support microSD, microSDHC, and microSDXC cards up to 2TB.
- Recommendations: Look for reputable brands (e.g., SanDisk, Samsung, Kingston) with a good read/write speed (UHS-I compatible, Class 10 or higher is recommended for optimal performance).
- Capacity: 128GB, 256GB, or even 512GB are popular choices and offer significant room for dozens of large digital titles and future updates.
- Installation: Simply turn off your Switch, lift the kickstand on the back of the console, and insert the microSD card into the slot. The Switch will automatically format it upon startup if needed.
- Moving Data: Once a microSD card is inserted, new downloads will automatically go to it. You can manually transfer existing downloaded software from system memory to the microSD card via System Settings > Data Management > Move Data Between System / microSD Card.
Transferring Data to a New microSD Card (if upgrading)
If you already have a microSD card and want to upgrade to a larger one, you can easily transfer your data:
- Turn off your Nintendo Switch.
- Remove the old microSD card.
- Insert the old microSD card into a computer (you might need a microSD to SD card adapter or a USB card reader).
- Copy all the data from the old microSD card to a temporary folder on your computer.
- Safely eject the old card, then insert the new, larger microSD card into your computer.
- Copy the data from the temporary folder on your computer to the new microSD card.
- Safely eject the new card and insert it into your Switch. The console should recognize all your games.
Conclusion: Play More, Worry Less
Running out of storage on your Nintendo Switch doesn’t have to put an end to your digital game library growth. By regularly checking your data management, strategically archiving unplayed games, selectively deleting media, and most importantly, investing in a high-capacity microSD card, you can ensure your Switch always has room for the next big adventure. Implement these tips to keep your console lean, mean, and ready for countless hours of gaming.


