
Running out of Switch storage? Best microSD card & game management tips?

The Nintendo Switch, with its vast library of digital games, is a fantastic console, but its 32GB (or 64GB for OLED) internal storage can fill up incredibly fast. From massive first-party titles to indie gems, your digital collection can quickly outgrow the available space, leading to frustrating decisions about what to keep and what to delete. Fortunately, expanding your Switch’s storage is simple, and managing your games effectively can ensure you always have room for your next adventure.
Why Your Switch Needs a MicroSD Card
Unlike some other consoles, the Nintendo Switch relies heavily on expandable storage for most users. Digital games, especially larger titles like The Legend of Zelda: Tears of the Kingdom or Pokémon Scarlet/Violet, can easily take up 10-15GB or more each. Even if you primarily buy physical game cartridges, many titles require significant downloads for updates, patches, and DLC that will eat into your internal memory. A microSD card is essentially a mandatory upgrade for any serious Switch owner.
Choosing the Right MicroSD Card for Your Switch
Not all microSD cards are created equal, but thankfully, the Switch doesn’t demand the absolute fastest cards on the market. Here’s what to look for:
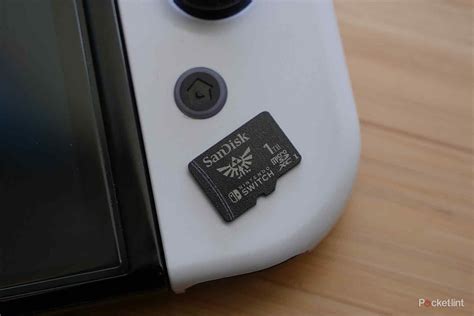
- Speed: The Switch supports UHS-I microSD cards. While you’ll see ratings like U1 or U3, and A1 or A2 (application performance class), for game loading, a good UHS-I U1 or U3 card from a reputable brand will be more than sufficient. A2 cards offer better random read/write speeds, which can slightly improve game loading times, but the difference is often negligible for the Switch compared to a quality A1 card.
- Capacity: This is where most people focus.
- 128GB-256GB: Good for casual players with a mix of physical and digital games, or if you only download a few large titles.
- 512GB: The sweet spot for many, offering a generous amount of space for a substantial digital library without breaking the bank.
- 1TB: For hardcore digital collectors. This provides ample room for dozens of AAA games and hundreds of smaller titles, ensuring you rarely have to delete anything.
Aim for the largest capacity you can reasonably afford, as you’ll likely fill it up over time.
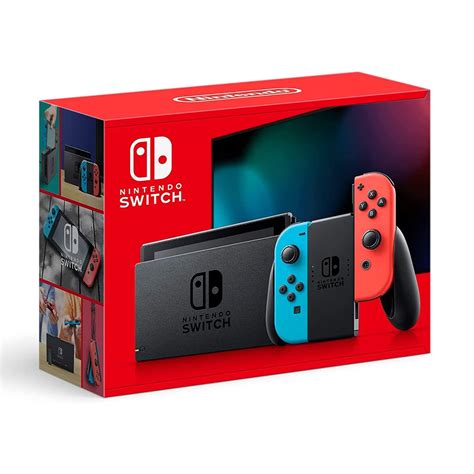
- Brands: Stick with well-known, reputable brands to avoid fakes and ensure reliability. SanDisk (especially their “SanDisk for Nintendo Switch” licensed cards), Samsung EVO Select/Plus, and Lexar are all excellent choices.
Installing and Formatting Your MicroSD Card
Installing a microSD card is incredibly straightforward:
- Turn off your Nintendo Switch completely (hold the power button and select “Power Options” > “Turn Off”).
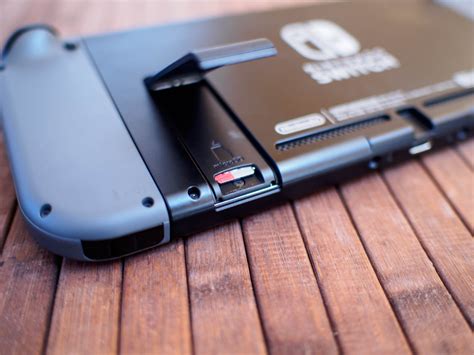
- Locate the microSD card slot on the back of the console (under the kickstand).
- Insert the microSD card into the slot until it clicks into place.
- Turn your Switch back on.
Your Switch will automatically detect and format the card if it’s new or not formatted correctly for the console. If you’ve used the card before, the Switch might prompt you to format it, which will erase all existing data on the card. Always back up any important data before formatting.
Smart Game Management Strategies
Even with a large microSD card, good management habits can save you headaches.
- Archive vs. Delete: The Switch offers two options when removing digital games:
- Archive Software: This removes the game data but keeps the game icon on your Home menu and saves your game progress. It’s ideal if you plan to play the game again later, as you can re-download it easily without losing progress.
- Delete Software: This removes the game data, the icon, and typically your save data (unless it’s backed up to the cloud via Nintendo Switch Online). Only use this if you’re certain you’ll never play the game again or if your save data is already safe.
Always choose “Archive Software” unless you’re absolutely sure.
- Re-downloading Games: Any digital game you’ve purchased can be re-downloaded from the eShop at any time. Don’t be afraid to archive games you’re not actively playing.
- Physical vs. Digital Games:
- Physical: Cartridges take up less space on your console’s storage (only requiring updates/DLC), but you need to carry them around.
- Digital: More convenient as they’re always available on your console, but they are the primary reason for needing large microSD cards.
A good balance often involves buying large, frequently played games physically and smaller, indie titles digitally.
- Check Storage Usage: Regularly go to System Settings > Data Management to see how much space your games and screenshots are taking up. This helps you identify large games you might want to archive.
Conclusion
Running out of storage on your Nintendo Switch is a common problem, but it’s easily solved with the right microSD card and smart game management. Investing in a high-capacity card from a reputable brand and regularly archiving games you’re not currently playing will ensure your Switch always has room for new adventures. Enjoy your ever-growing digital library without the constant worry of insufficient space!