
How to optimize Switch storage for numerous indie game downloads?
The Indie Game Lover’s Dilemma: Maximizing Switch Storage
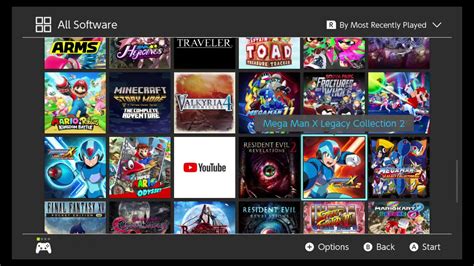
The Nintendo Switch has become a haven for incredible indie titles, offering a vast and ever-growing library of unique experiences. However, the joy of discovering new digital gems often comes with a looming challenge: managing storage space. With the console’s limited internal memory, indie game enthusiasts frequently find themselves juggling downloads. This guide will walk you through essential strategies to optimize your Switch storage, ensuring you always have room for that next must-play indie.
The Foundation: Understanding Your Switch’s Storage
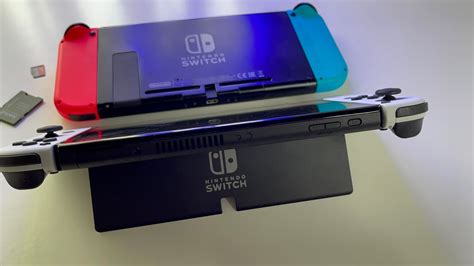
Before diving into optimization, it’s crucial to understand how your Switch handles data. The standard Nintendo Switch models come with 32GB of internal storage, while the OLED model offers 64GB. A significant portion of this is reserved for the system itself, leaving a surprisingly small amount for game downloads. This limited internal space quickly fills up, especially with many indie titles, which, while often smaller than AAA blockbusters, can still add up to hundreds of megabytes or even several gigabytes each.
The solution lies in external storage: microSD cards. The Switch supports microSDHC and microSDXC cards, allowing for massive expansion that is practically limitless for most users.
Investing in a High-Capacity microSD Card
This is arguably the most critical step for any avid digital game downloader. A high-capacity microSD card transforms your Switch’s storage capabilities from restrictive to expansive. While smaller cards (e.g., 128GB or 256GB) might suffice for a casual player, indie game connoisseurs should aim for larger capacities.
- 512GB: A solid sweet spot for many, offering ample room for dozens, if not hundreds, of indie games.
- 1TB: For the ultimate digital collector, a 1TB card virtually eliminates storage concerns for the foreseeable future, allowing you to download games without a second thought.
When purchasing, look for cards from reputable brands and consider a U3 speed rating for faster load times, though a U1 card will generally work perfectly fine for Switch games.
Archiving vs. Deleting: Know the Difference
When your storage starts to run low, the Switch offers two primary options for clearing space, each with distinct implications:
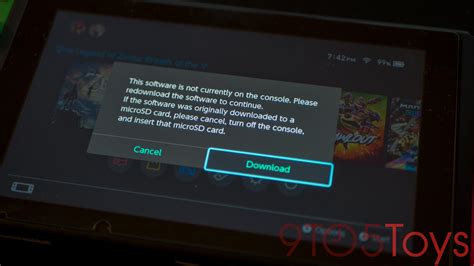
- Archive Software: This is your best friend for managing a large indie library. Archiving removes the game’s core data from your system but leaves its icon on the Home menu and, crucially, retains your save data. If you wish to play the game again, simply select its icon to redownload it. This is ideal for games you might want to revisit but don’t need installed at all times.
- Delete Software: This option completely removes the game and all associated save data from your Switch, unless that save data is backed up to the cloud (more on that next). Only use this for games you are absolutely certain you’ll never play again, or if you have a Nintendo Switch Online subscription for cloud saves.
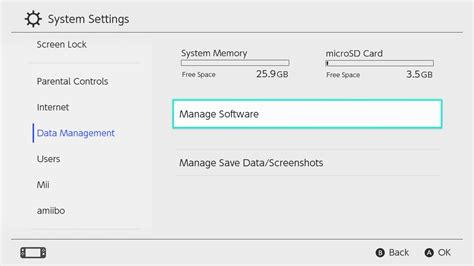
To access these options, navigate to System Settings > Data Management > Manage Software, then select the game you wish to manage.
Managing Save Data and Leveraging Cloud Backups
It’s important to remember that game save data is stored separately from the game’s main installation files. Even if you archive a game, your save data remains on the console’s internal memory. This is generally a good thing, ensuring your progress is safe. However, save data can still accumulate.
For ultimate peace of mind and efficient storage management, a Nintendo Switch Online subscription is invaluable. This service includes Cloud Save Data Backup, which automatically uploads your game saves to Nintendo’s servers. This means:
- You can safely delete games without losing your progress (as long as it’s been backed up).
- If your Switch is lost or damaged, your saves are secure and can be downloaded to a new console.
- It helps if you manage multiple Switch consoles or need to transfer user data.
Conduct Regular Storage Audits
Just like tidying up your physical bookshelf, regularly auditing your Switch’s storage can prevent it from becoming overwhelmed. Make it a habit to check your data management settings every few months.
Go to System Settings > Data Management. Here, you can see a breakdown of what’s taking up space: game software, save data, and screenshots/videos. You can then manage software directly from this menu, easily identifying large games or titles you haven’t played in ages that could be archived.
- Prioritize: Keep your currently playing games and frequently revisited favorites installed.
- Archive Less-Played Titles: Games you’ve finished or rarely touch are prime candidates for archiving.
- Delete Truly Unwanted Demos: Demos can add up; if you’re not going to buy the full game, delete the demo.
Strategic Downloads: Physical vs. Digital (A Brief Note)
While this article focuses on digital downloads, it’s worth a quick mention that physical game cartridges store the majority of their data on the cartridge itself. This means they consume less internal or microSD card space than their digital counterparts (though updates and DLC still download to your storage). If storage is a constant battle, considering a physical purchase for larger games can sometimes alleviate pressure on your digital space.

Conclusion: Play More, Worry Less
With a proactive approach to storage management, you can continue to enjoy the vast and vibrant world of indie games on your Nintendo Switch without constant storage anxieties. By investing in a high-capacity microSD card, understanding the nuances of archiving, leveraging cloud saves, and performing regular audits, you’ll ensure your console remains a welcoming home for all your favorite digital adventures. Happy gaming!