
How to maximize Nintendo Switch storage for digital game libraries?

For many Nintendo Switch owners, the console’s internal 32GB (or 64GB for OLED models) storage fills up surprisingly fast, especially with an ever-growing digital game library. Unlike physical game cartridges, digital titles are stored directly on the console or an inserted MicroSD card, consuming valuable space. Maximizing your storage isn’t just about having more room; it’s about seamless access to your favorite games without constant deletion and re-downloading. This guide will walk you through the most effective strategies to expand and manage your Switch’s storage.
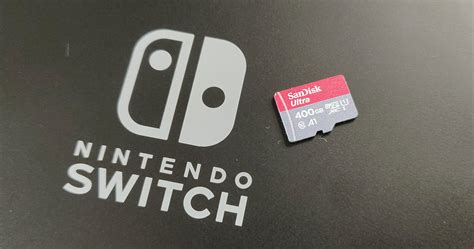
The Essential Solution: MicroSD Cards
The most crucial step in expanding your Switch’s storage is investing in a high-quality MicroSD card. The Nintendo Switch supports UHS-I MicroSD cards, with capacities up to 2TB (though 1TB is currently the largest widely available). Look for cards with fast read/write speeds to ensure smooth game loading and performance. A good starting point is a U1 or U3 rated card with an A1 or A2 application performance class, which are optimized for running apps and games.
When choosing a size, consider your gaming habits. If you primarily play indie titles or a few large AAA games, 128GB or 256GB might suffice. However, for serious digital collectors, 512GB or even 1TB will provide ample breathing room for years to come. Remember, you can always upgrade, but transferring data can be a minor hassle.
Managing Your Existing Data
Once you have a MicroSD card, or even if you’re just optimizing internal storage, understanding data management is key. The Switch offers two primary options for clearing space: “Archive Software” and “Delete Software.”
- Archive Software: This option deletes the game data from your console/MicroSD card but keeps its icon on your home screen and preserves your save data. You can re-download the game at any time from the eShop or your user page. This is ideal for games you might want to play again later but don’t need immediate access to.
- Delete Software: This completely removes the game data and its icon. While your save data is typically preserved separately (unless you specifically delete it), you’ll need to search for the game again in the eShop if you want to re-download it. Use this for demos or games you’re absolutely certain you’ll never play again.
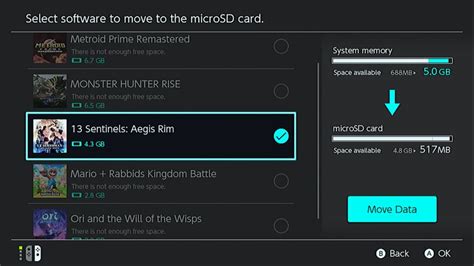
You can also manually move software data between the system memory and the MicroSD card via the Data Management settings. This is useful if you want to free up internal storage for system updates or specific games that might benefit from faster internal memory, though most games run perfectly well from a MicroSD card.
Optimize Your Downloads and Library
Being strategic about what you download and keep can significantly impact your available storage. Here are a few tips:
- Prioritize Essential Games: Only download games you intend to play in the near future. Don’t pre-load games months in advance if you’re tight on space.
- Clear Out Demos: Demos can take up significant space for a one-time play. Once you’ve tried it, delete it.
- Review Regularly: Periodically go through your installed software list. If there are games you haven’t touched in months and have no intention of revisiting soon, archive them.
- Cloud Save Data: While save data takes up minimal space, Nintendo Switch Online subscribers benefit from Cloud Save Data backup. This ensures your progress is safe even if a game is archived or deleted, and allows easy recovery if you ever get a new Switch.

Smart Habits for Digital Gamers
Cultivating good habits can prevent storage woes before they start:
- Consider Physical Copies: For extremely large games, buying the physical cartridge can save considerable space on your MicroSD card, as only game updates and save data are stored locally.
- Monitor Available Space: Regularly check your remaining storage in System Settings > Data Management. This helps you anticipate when you might need to archive or delete software.
- Don’t Over-Buy: It’s easy to get carried away in eShop sales. Be mindful of your storage capacity when adding new titles to your digital backlog.

Conclusion
Maximizing your Nintendo Switch storage is a straightforward process that primarily involves investing in a good MicroSD card and adopting smart data management practices. By archiving games you’re not actively playing, deleting unnecessary demos, and being mindful of your digital purchases, you can ensure your Switch always has room for new adventures. Keep these tips in mind, and you’ll spend less time managing files and more time enjoying your extensive digital library.