


Switch storage full? How to expand microSD for big & small digital games effectively.
The Inevitable Storage Crunch: Why Your Switch Fills Up Fast
It’s a tale as old as digital gaming: you’ve just downloaded a new AAA title or a handful of indie gems, and suddenly, that dreaded “not enough free space” message pops up on your Nintendo Switch. With a mere 32GB (or 64GB for the OLED model) of internal storage, a significant portion of which is reserved for the system, it doesn’t take long for even modest digital libraries to hit their limits. Games like The Legend of Zelda: Tears of the Kingdom or Pokémon Scarlet/Violet can easily consume over 15GB each, leaving precious little room for anything else.
Fortunately, Nintendo designed the Switch with expansion in mind, offering a simple yet powerful solution: microSD cards. This guide will walk you through effectively expanding your Switch’s storage, ensuring you always have room for big adventures and small delights alike.

Picking the Perfect microSD Card: Speed, Capacity & Brand
Not all microSD cards are created equal, and choosing the right one is crucial for optimal performance. When shopping for Switch storage, three main factors come into play:
Capacity: How Much Space Do You Need?
While the Switch supports cards up to 2TB (though 1TB is currently the largest widely available and affordable option), your ideal capacity depends on your gaming habits. If you primarily buy physical game cartridges and only download a few digital titles or DLC, a 64GB or 128GB card might suffice. However, for a predominantly digital library, especially one with large AAA games, aim for 256GB, 512GB, or even 1TB. Remember, it’s always better to have more space than you think you need.
Speed: Don’t Compromise Performance
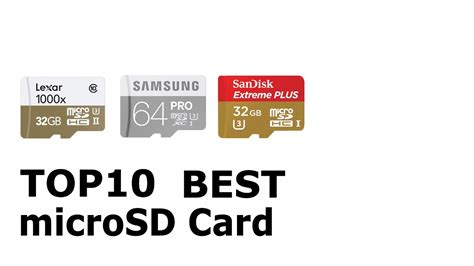
The Nintendo Switch benefits from faster read speeds to load games quickly. Look for cards rated “UHS-I (U1 or U3)” with a “V30” speed class if possible. These designations indicate minimum write speeds and are ideal for handling game data. While the Switch doesn’t fully utilize the highest speeds of UHS-II cards, a good quality UHS-I card from a reputable brand like SanDisk, Samsung, or Lexar will deliver excellent performance.
Reputable Brands: Quality & Reliability
Stick to well-known brands. Off-brand or unusually cheap cards can be counterfeit, unreliable, or not deliver the advertised speeds, potentially leading to corrupted data or slow load times. Invest in a quality card from a trusted manufacturer for peace of mind.
Installing and Formatting Your New microSD Card
Once you have your chosen microSD card, installation is straightforward:
- Power Down Your Switch: It’s best practice to completely power off your Switch (hold the power button, then select “Power Options” > “Turn Off”) before inserting or removing the microSD card.
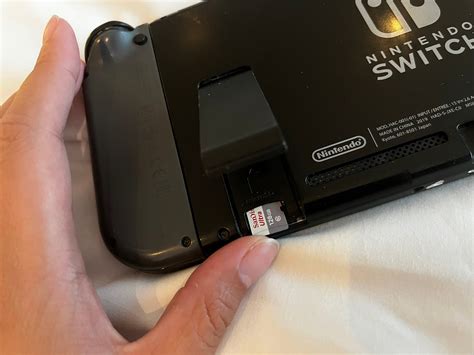
- Locate the Slot: The microSD card slot is located under the kickstand on the back of the Switch console. Lift the kickstand to reveal it.
- Insert the Card: Gently slide the microSD card into the slot with the label facing the same direction as the Switch screen, until it clicks into place.
- Power On: Turn your Switch back on. The system will automatically detect the new card.
- Automatic Formatting: The Switch will prompt you to format the card if it’s new or not in the correct format. Always select “Format” when prompted. This prepares the card specifically for Switch game data. If it doesn’t prompt, the card is likely already formatted correctly for the Switch.
Managing Your Games: Moving Data and Archiving Effectively
With your microSD card installed, new digital game downloads and software updates will automatically save to it (as long as there’s space). But what about existing games on your internal storage?
Moving Existing Games (Effectively)
Nintendo doesn’t offer a direct “move game to SD card” option from the main system settings. The most effective way to transfer games from internal memory to your microSD card is to:
- Archive the Software: On the HOME Menu, highlight the game you want to move. Press ‘+’ or ‘-‘ to open Options, then select “Manage Software” > “Archive Software.” This deletes the game data but keeps its icon and save data.
- Redownload the Software: Select the archived game icon on your HOME Menu and choose “Download.” The system will now automatically download the game data to your microSD card (assuming it has space).
Repeat this process for any games you wish to transfer. Your save data is stored separately on the internal memory and cannot be moved, ensuring it’s always safe.
Archiving vs. Deleting Software
Understanding the difference is key to efficient storage management:
- Archive Software: Deletes the game data itself but keeps the game icon on your HOME Menu and, crucially, preserves your save data. It frees up space but allows for easy redownload later.
- Delete Software: Deletes both the game data and its icon from your HOME Menu. While save data often remains (unless you specifically delete save data), archiving is generally preferred for games you might want to play again.

Pro Tips for Optimal Switch Storage Management
To make the most of your expanded storage:
- Prioritize Large Games: Always try to install your largest digital games directly to the microSD card.
- Regularly Check Storage: Go to System Settings > Data Management to see how your space is being used on both internal memory and the microSD card.
- Backup Save Data (Nintendo Switch Online): While save data stays on internal memory, having a Nintendo Switch Online subscription allows you to back up most of your game saves to the cloud, adding an extra layer of security.
- Consider Physical Cartridges: For games you know you’ll play long-term and that have large file sizes, buying the physical cartridge can save microSD card space, as only minor updates are stored digitally.

Never Run Out of Room Again
Running out of storage on your Nintendo Switch can be frustrating, but expanding it with a high-quality microSD card is a simple and highly effective solution. By choosing the right card, properly installing it, and understanding how to manage your game data, you can significantly boost your console’s capacity. Say goodbye to that pesky “storage full” message and hello to endless gaming possibilities!


